Simple summer salad featuring fresh-off-the-boat tuna

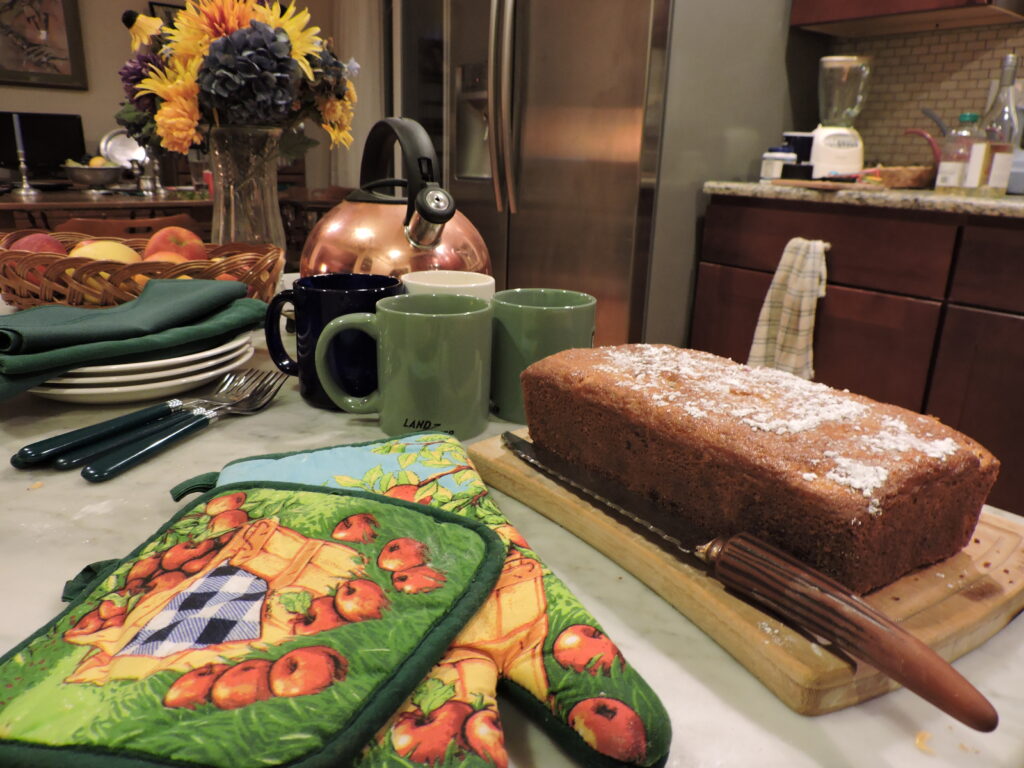
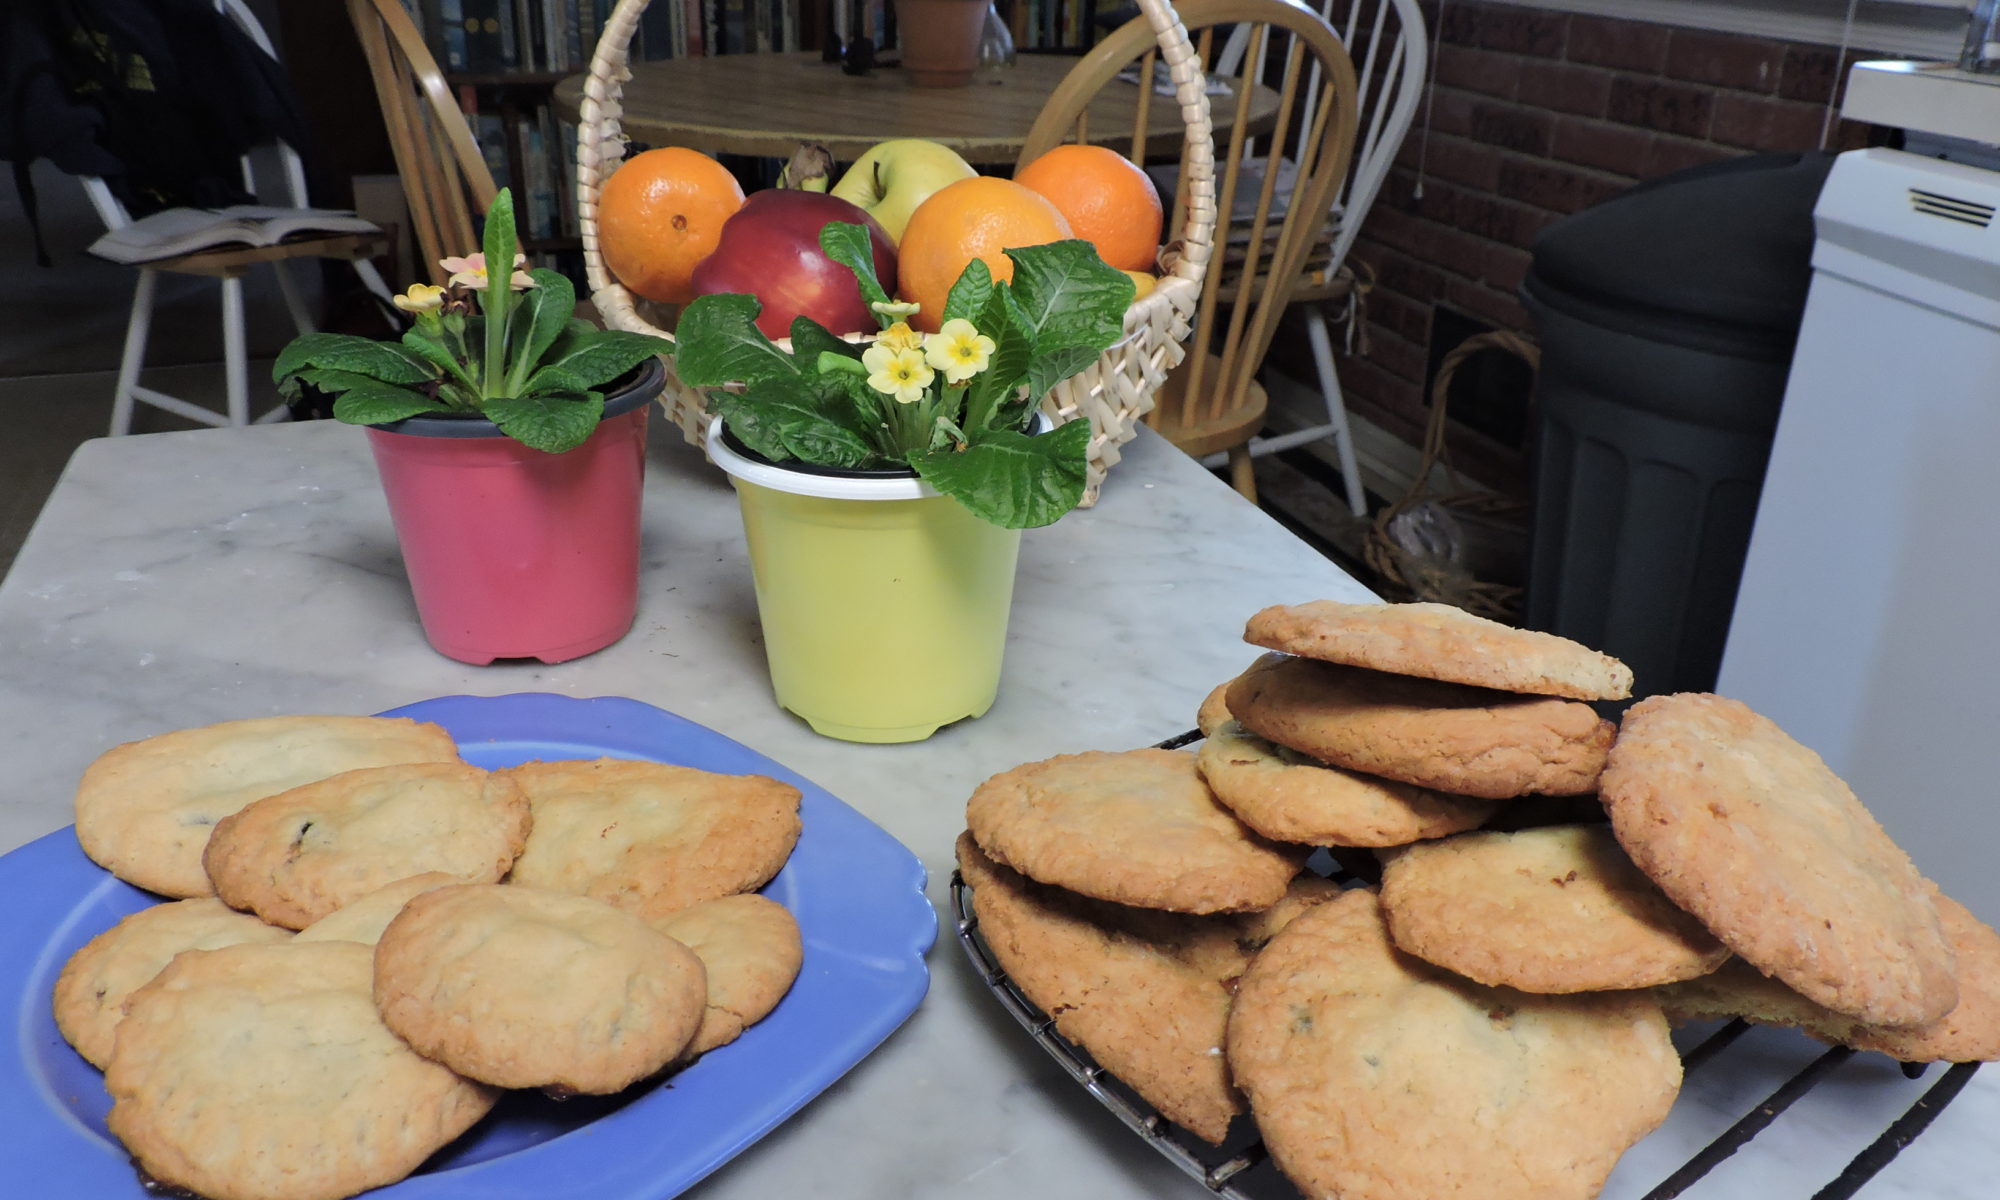
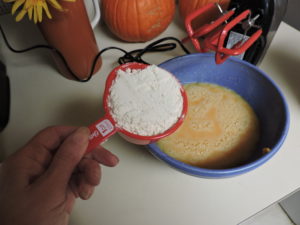
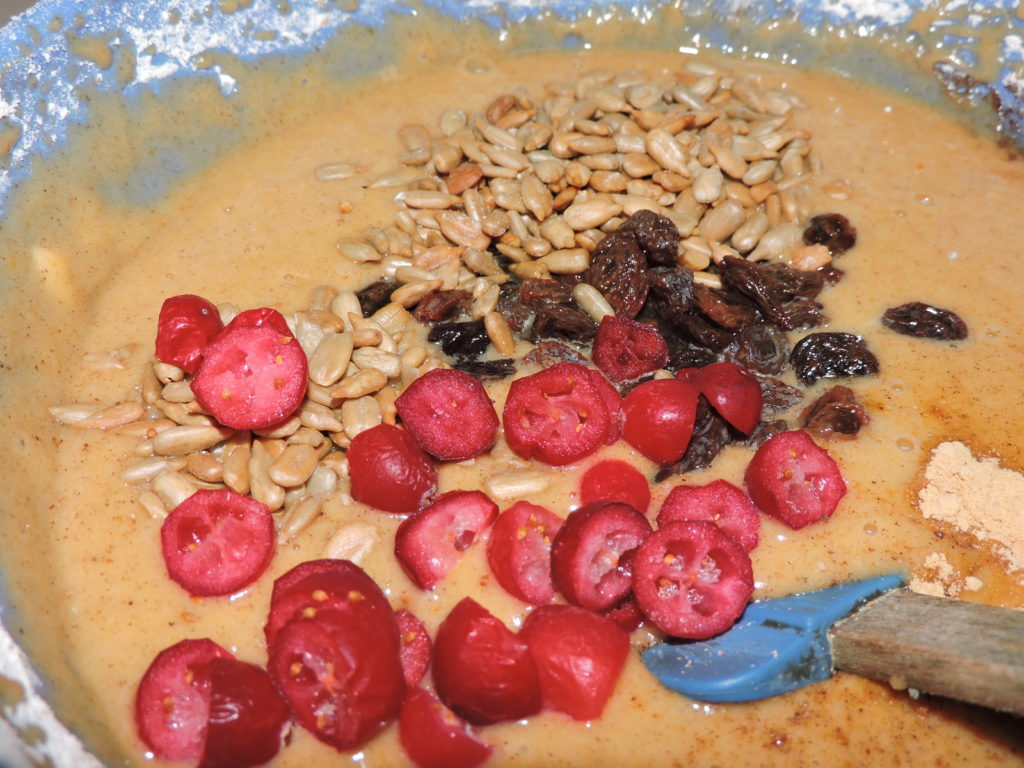
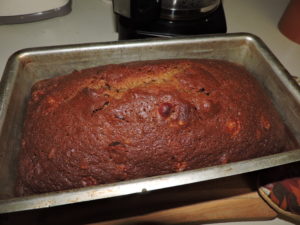
A Sharon Lee’s Table Recipe

Who knew a gift from a friend would net, not one, but two great dishes the second of which was this quick salad whipped up after a busy Saturday. My neighbor Al returned from a fishing trip late one evening with a generous amount of freshly caught tuna that he kindly shared with me and another neighbor.

Al cut each of us a sizable portion of tuna which he told us to ice down and place in the refrigerator overnight. What a great gift!

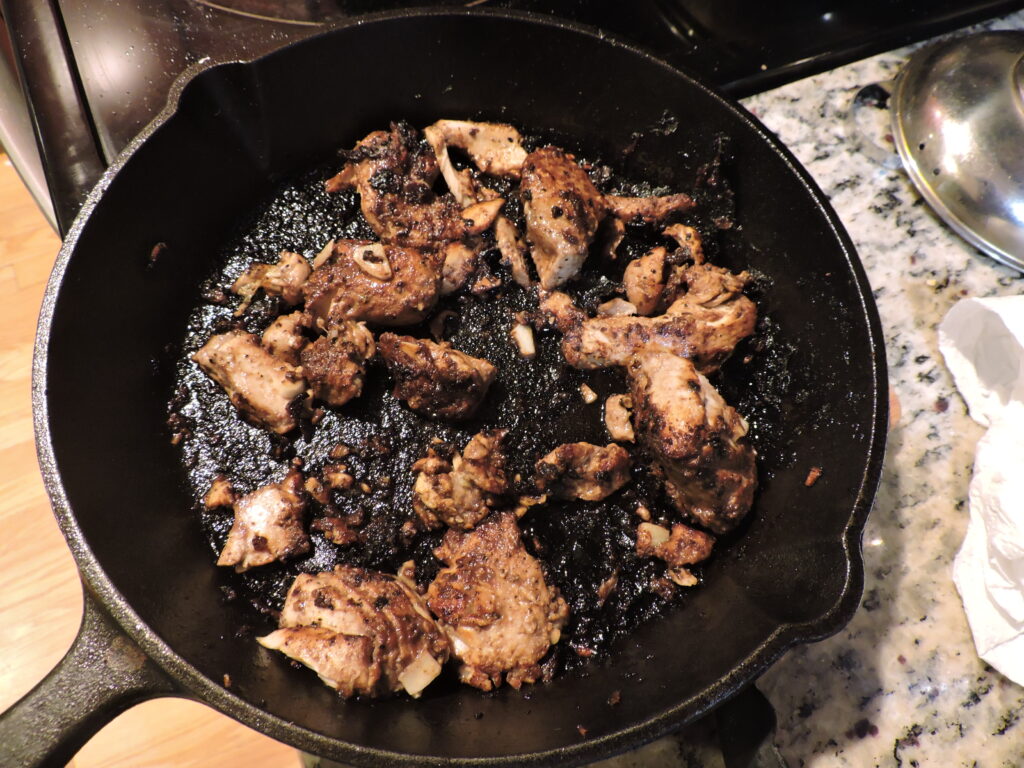
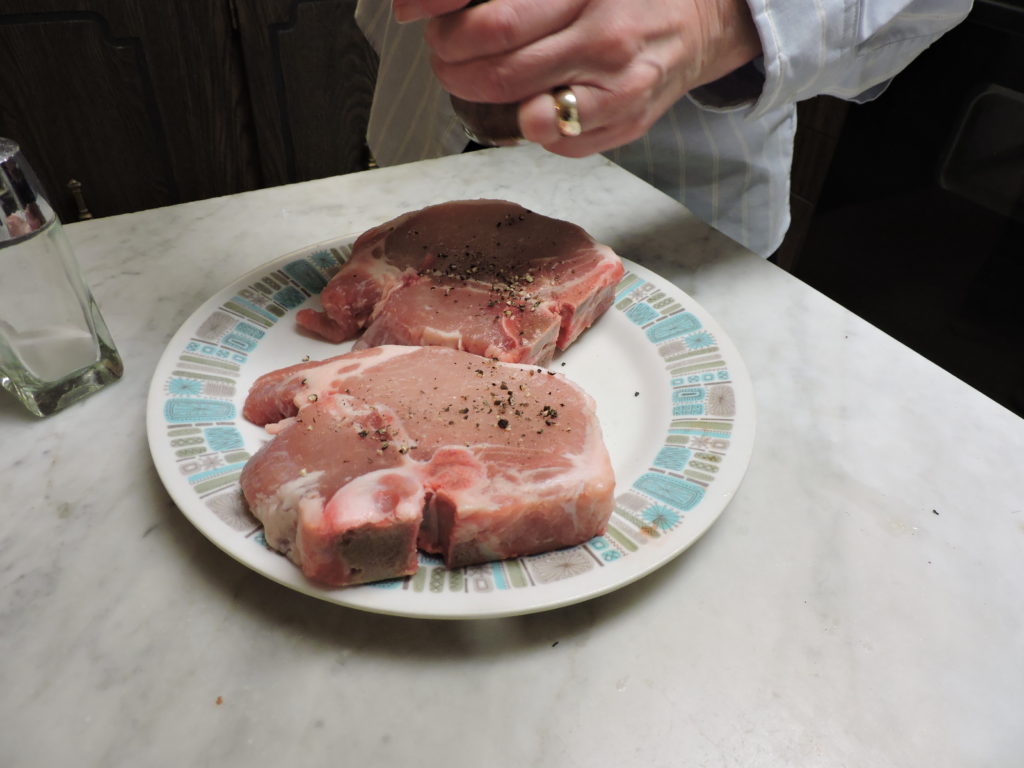
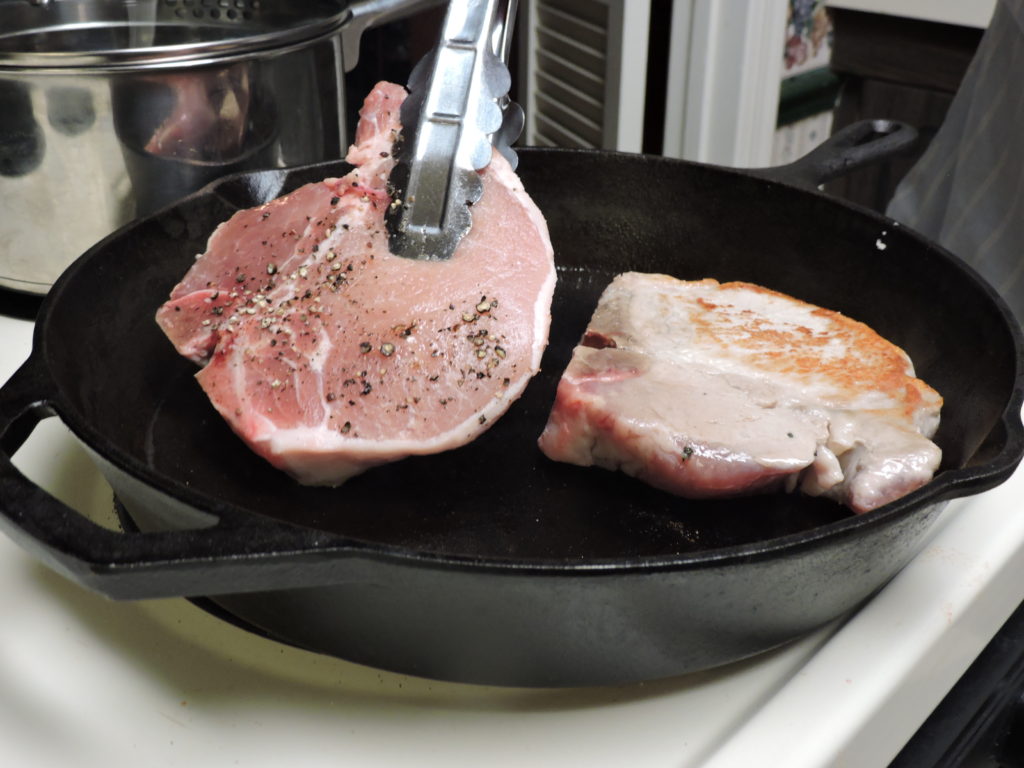
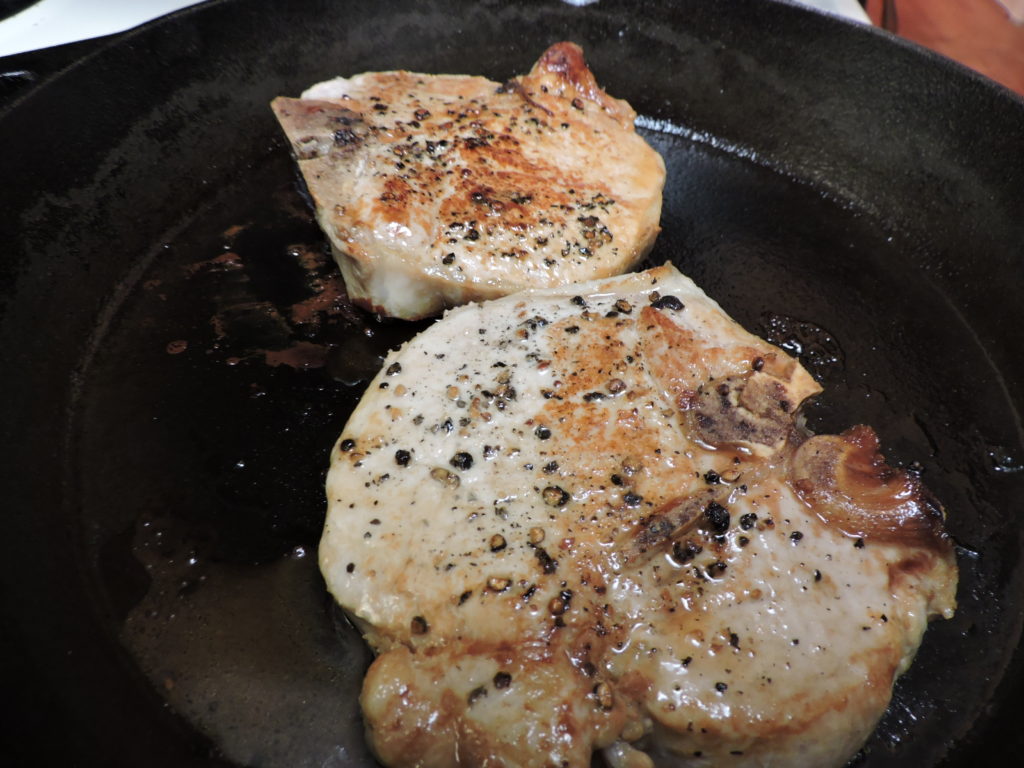
Next day, I summoned my son Eric – a genius when it comes to cooking fish – who cut four tuna steaks from the piece, set them in a balsamic vinegar based marinade he made, turning them several times. He then seared the tuna in a cast iron pan. The fish was superb.

The remaining marinated tuna cut into small pieces and seared in a cast iron pan. Photos by Sharon Lee Tegler

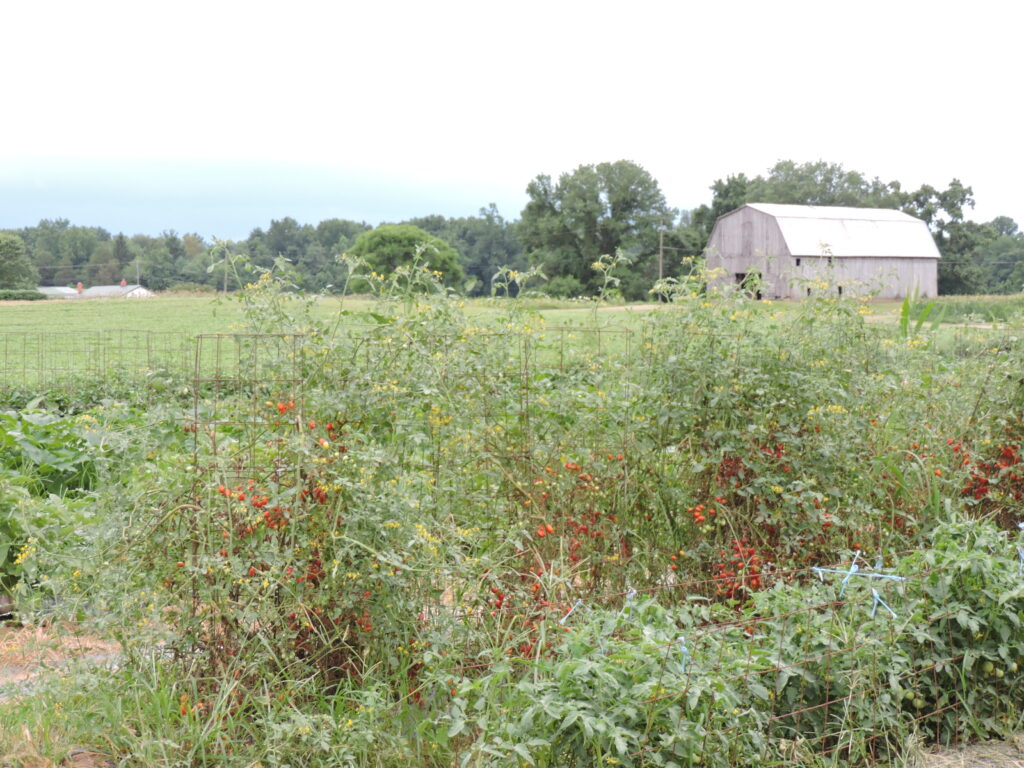
Lucky for me, there was some tuna left in the remaining marinade in the fridge. I asked Eric to divide it into smaller pieces and sear it to save for the following day. It became the basis for a simple summer salad – one that was light, bright and perfect for a 90 degree day.

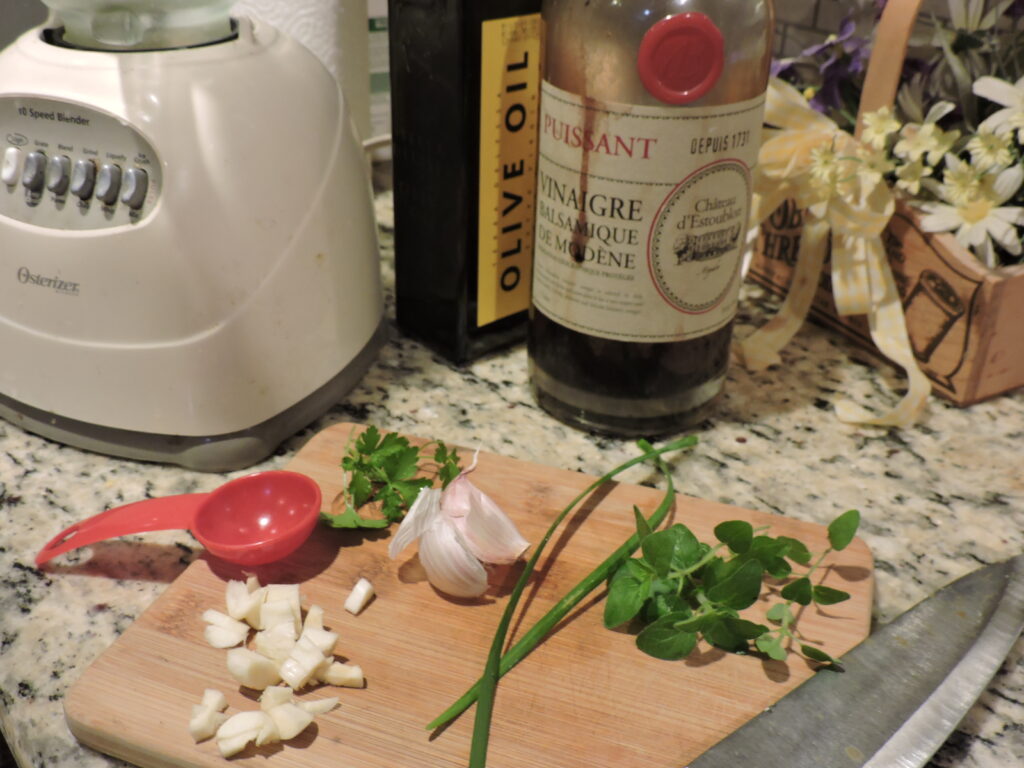
Eric eyeballed measurements for the marinade recipe but tells me he loosely based it on one in the “Store to Shore Cookbook” by charter yacht captain Jan Robinson. His version is below.

Seared Tuna

  • 4 Tuna Steaks
  • 1/3 of a cup olive oil (roughly)
  • 2 cloves (or more) of garlic chopped
  • 3 or 4 Tablespoons of balsamic vinegar
  • A pinch of salt
  • Ground peppercorns to taste
  • A fresh lemon or two

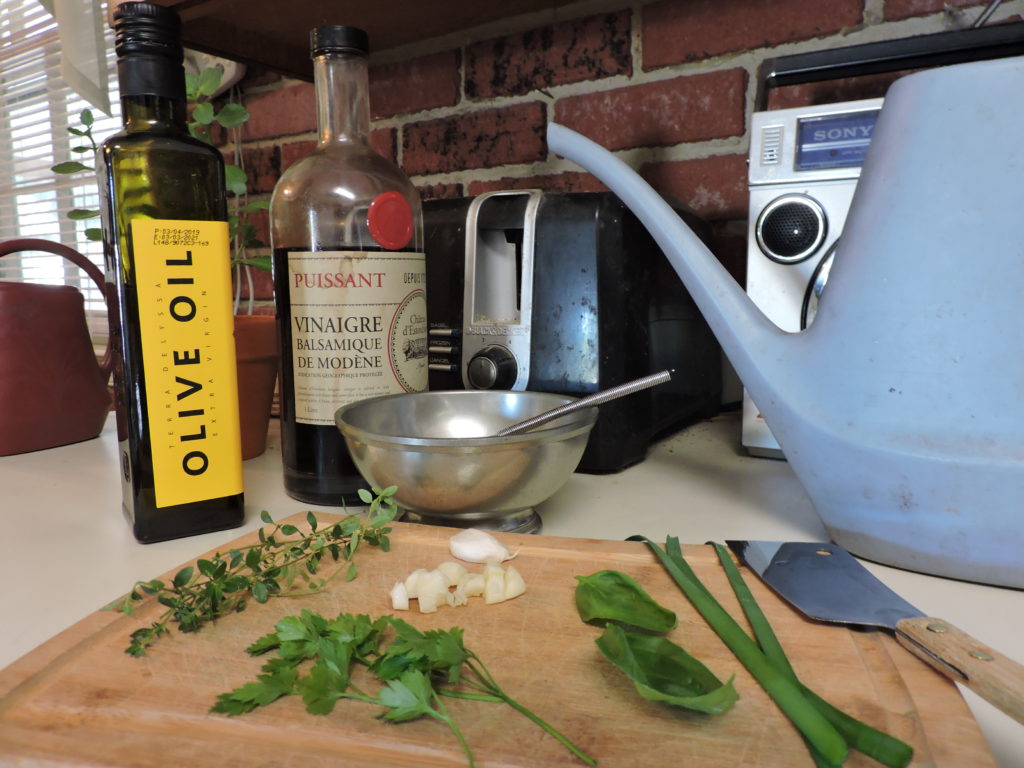
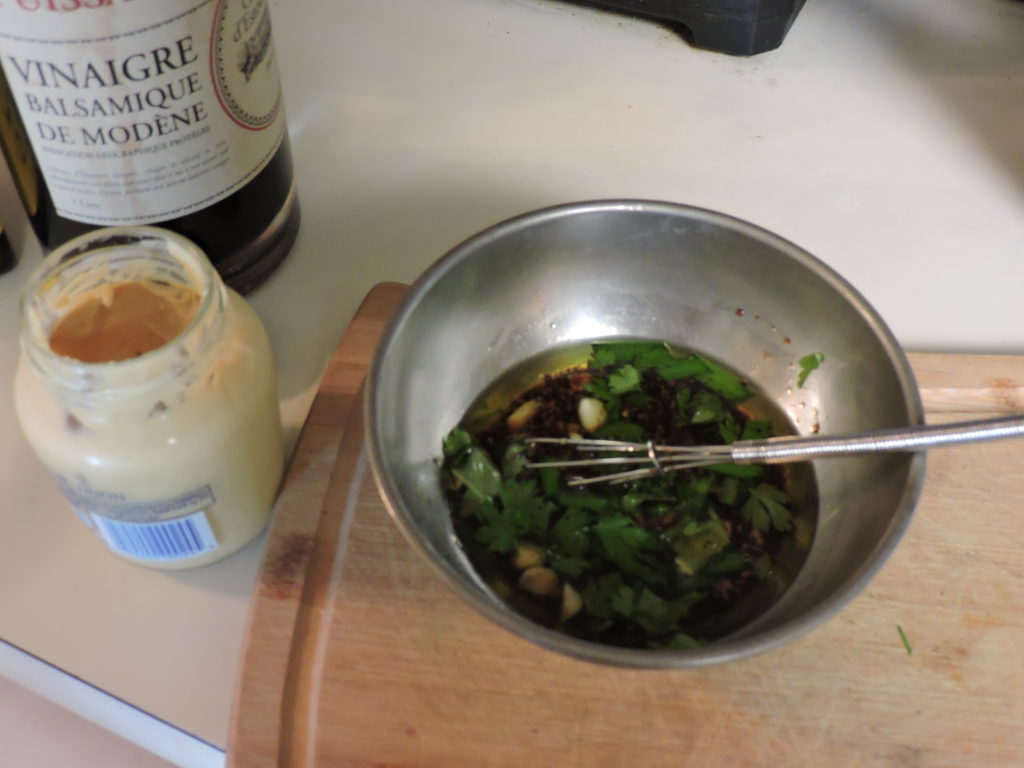
Whisk together the olive oil, garlic, balsamic vinegar, and dashes of salt and pepper. Eric decided to add squeezes of fresh lemon juice. He notes that the marinade-coated tuna sort of caramelized as it browned adding a touch of sweetness. Additional drizzles of lemon juice as the fish cooked added a hint of piquancy.

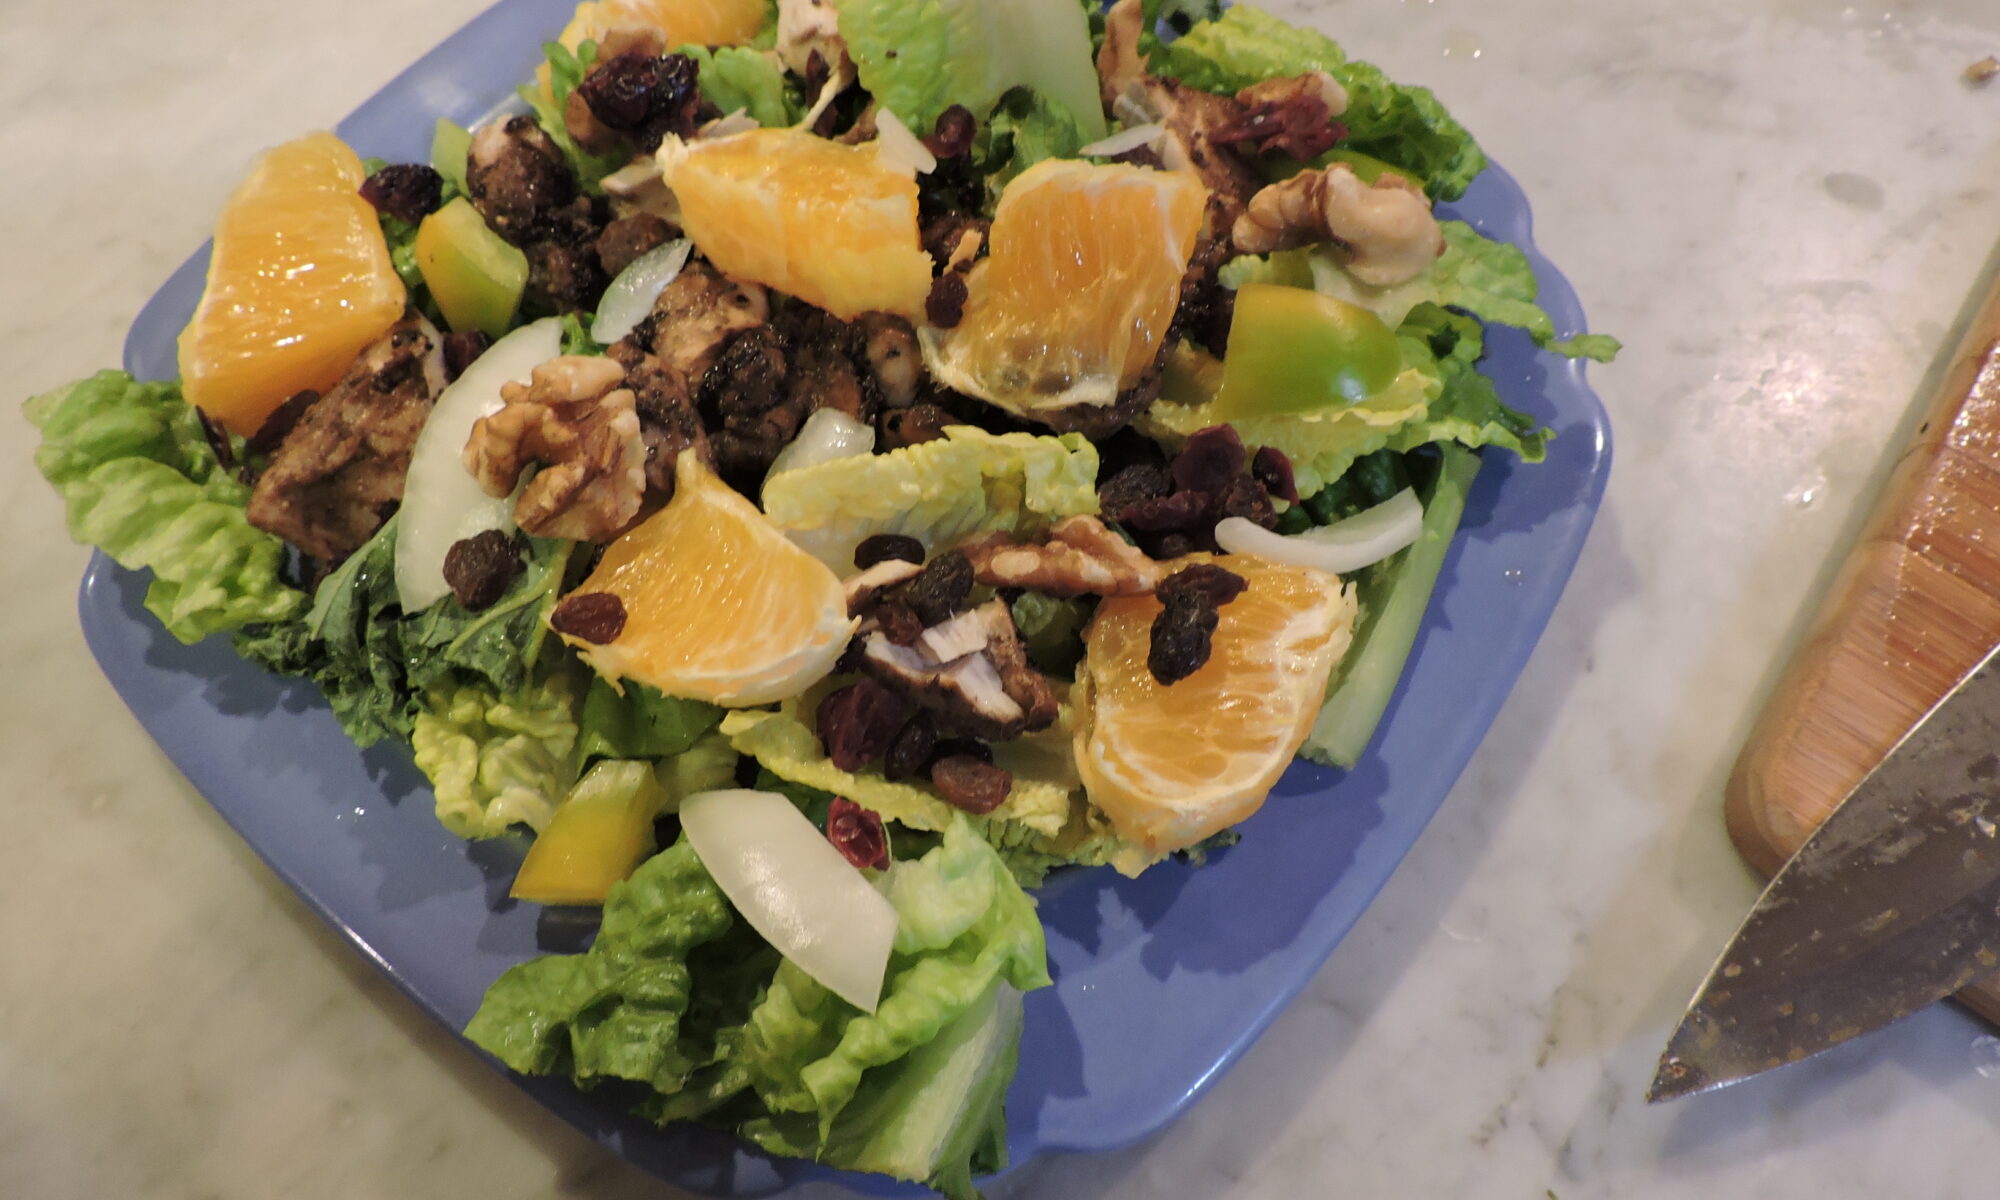
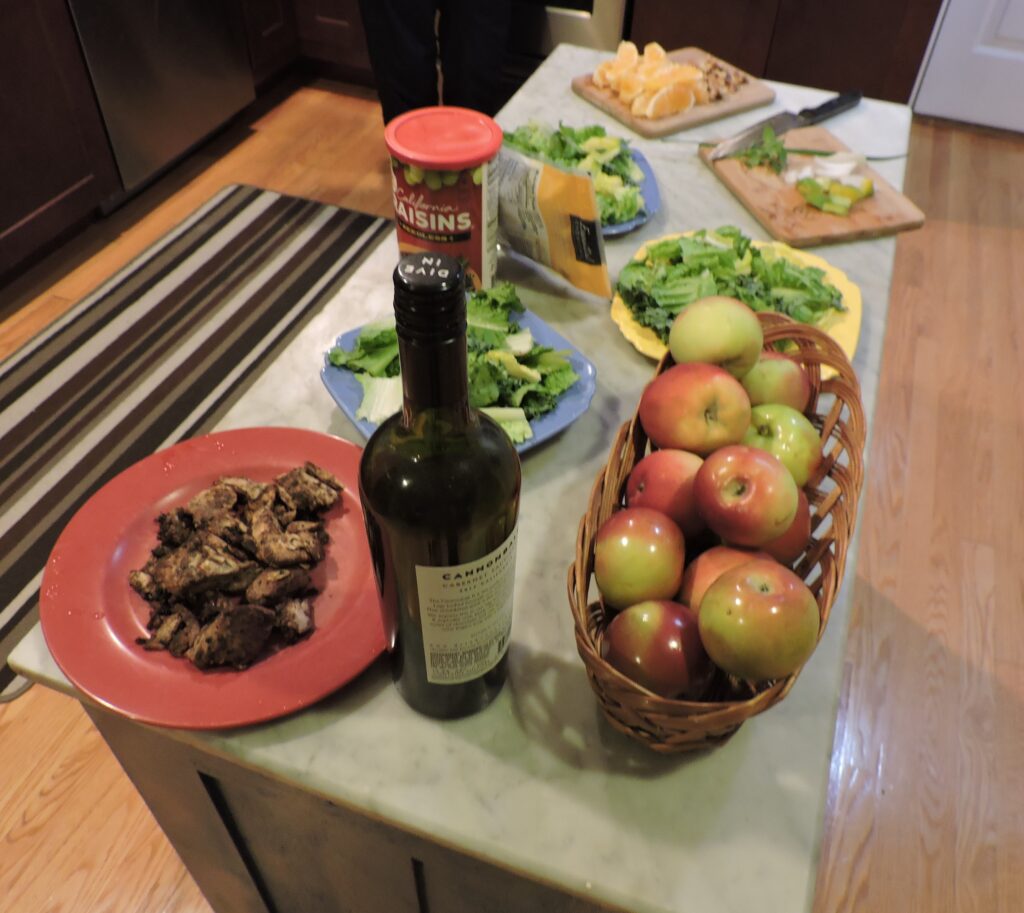
Obviously, we devoured the great tuna steaks. But I refrigerated the smaller pieces of seared tuna that were left. Making the “second day” salad from ingredients already at hand, including a head of romaine lettuce was easy.

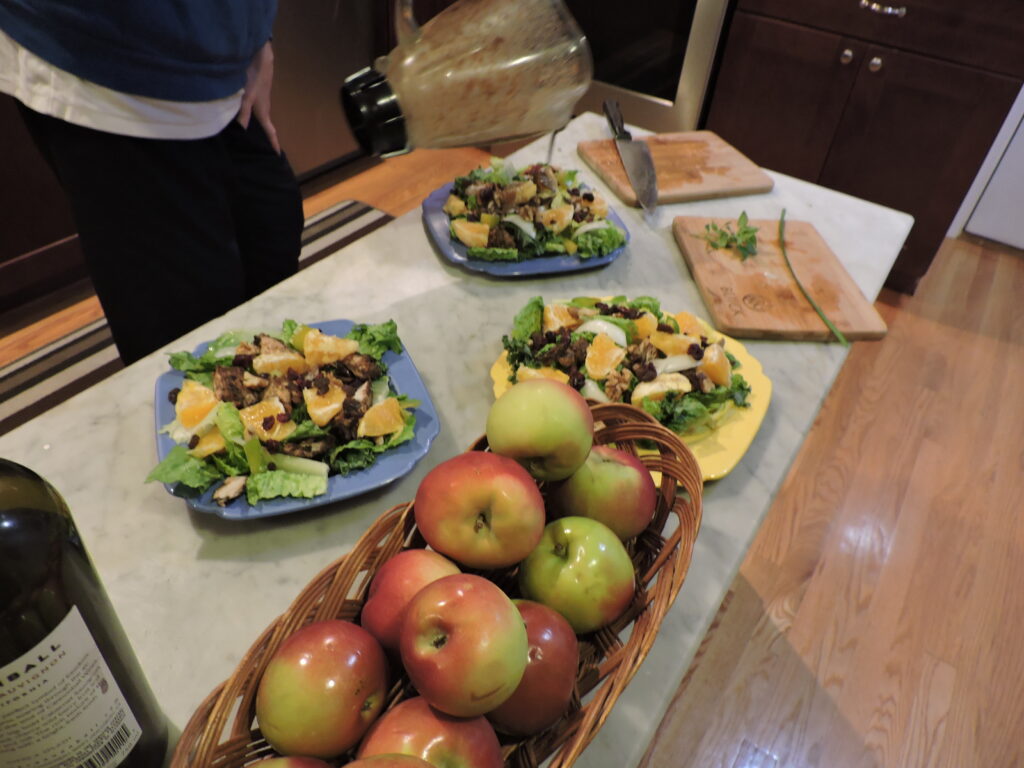
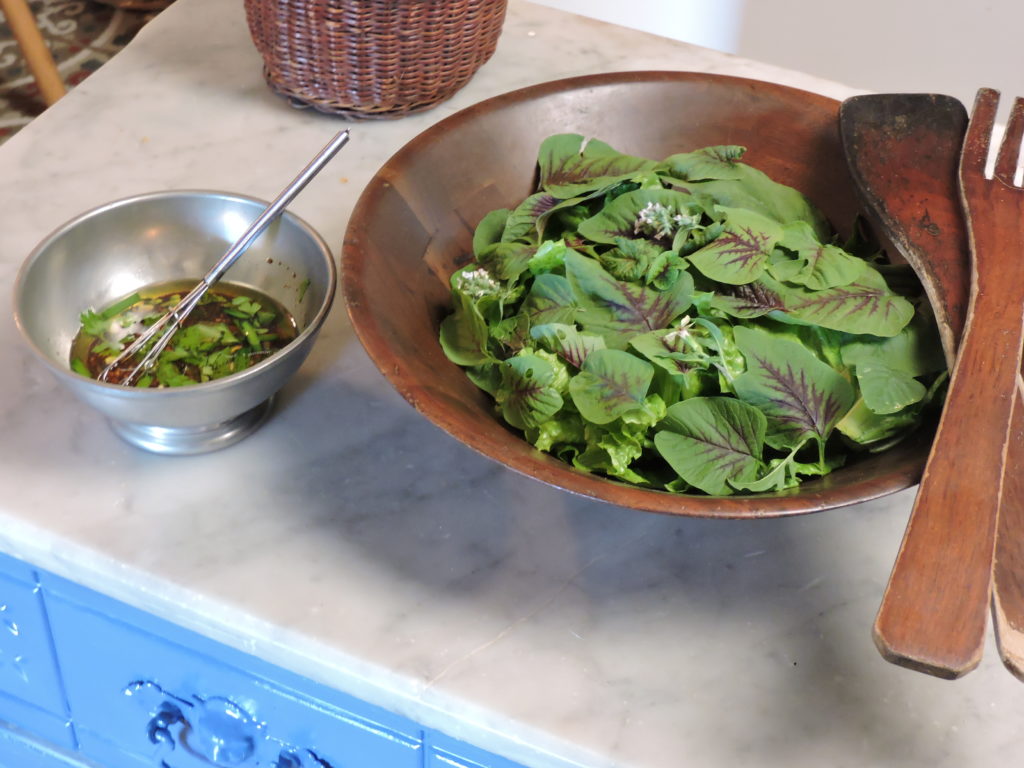
The leftover tuna was just as tasty the second day. Because of the touch of sweetness imparted by the balsamic marinade, I chose to make a balsamic dressing for the salad to which I added chopped onion and green pepper and then tossed in slices of orange, dried cranberries and raisins and walnuts which contrasted nicely with the savory pieces of tuna. My recipe for the balsamic vinaigrette is below.

Balsamic Vinaigrette

  • 1 or two cloves of garlic (chopped)
  • 1/4 teaspoon of sugar
  • 2 Tablespoons of olive oil
  • 2-3/4 Tablespoons of balsamic vinegar
  • 1/2 teaspoon of Dijon mustard
  • Fresh herbs of your choice (I like oregano, sage, basil, thyme, and chives)

Assemble the ingredients and whisk in a bowl, blend in a blender or shake in a jar.

A balsamic vinaigrette with fresh herbs provided a light, bright finish for the salad.

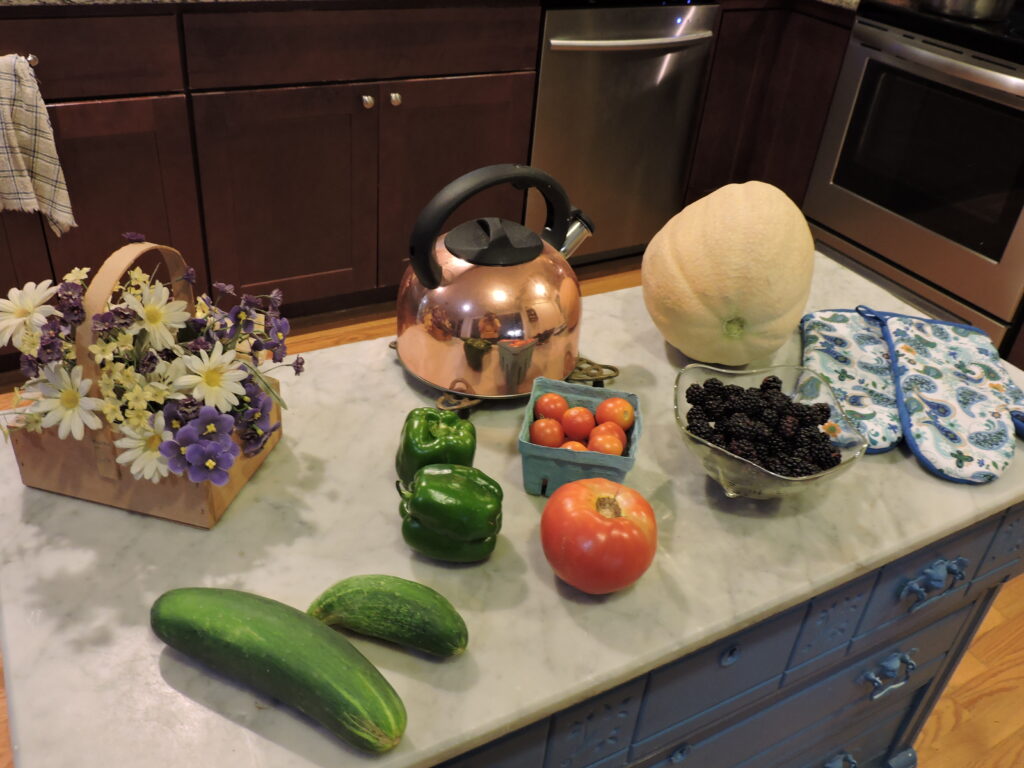
The ingredients – a plate of tuna pieces, salad greens, chopped pepper and onion, orange slices, walnuts, raisins and cranberries — are then easy to assemble. Though the tuna for the salad was gifted this time, I can envision buying some from a fish market or supermarket fish counter to make this recipe again.

A drizzle of balsamic vinaigrette completes the process.

Bon appetite!

Captain Jan Robinson’s original recipe appearing in the “Store To Shore Cookbook” differs slightly. There are many other tasty recipes of all types in her book which should still be available at About The Author – Ship To Shore Cookbook Collection By Author Capt. Jan Robinson In The Caribbean Island Of St. Thomas Usvi Virgin Island (shiptoshoreinc.com).

Fall colors and orchard fruit set the table for apple cranberry bread

Autumn’s clear skies, cooler temperatures and crisp air arrived just in time for my trip to Catoctin Mountain Park near Thurmont, Maryland. Not only was the trip up and down the mountain breathtakingly scenic, but signs at the foot of the mountain as we came back down pointed the way to Pryor’s Orchard.

With acres of apple, peach, cherry, plum and other fruit trees, the orchard was beautiful and reminiscent of those I visited as a child with my father Sheldon Owings when he made his annual pilgrimages to orchards for apples to make cider.

Pryor’s Orchard Market building brimmed with baskets of peaches, pears, apples and other fruits plus green beans from the garden.

The market building at the end of Pryor Road was filled with myriad varieties of apples, peaches, pears and plums plus fresh-from-the field green beans, jams and wines. There were antique farm implements on display that dated back to the orchard’s beginnings as a dairy farm in 1905. There was an amazing display of ribbons won in past competitions

Everyone visiting the orchard market exited with their arms full .

I left the market carrying bags of deliciousness…..with the exception of wine which I planned to buy at our next stop, Springfield Manor Winery, where the surrounding fields were filled with lavender and the tables were filled with very satisfied customers, many of whom came out from Washington, D.C. for the day.

Needless to say, I arrived home a very happy camper and immediately set out my bounty. Then I pondered what to make.

I had three kinds of apples, Bartlett pears, yellow peaches, Damson preserves, peach butter, and enough green beans for two meals.

Answers came easily. I had eggs, milk and bread on hand so I sliced some of the peaches over a quick batch of French toast for breakfast.

The peaches were so good, I simply sliced the rest over store-bought pound cake and topped them with whipped cream. for a splendid dessert.

The green beans were cooked with a ham bone from my freezer just as my grandmother made them.

For the apples, however, I concocted a new quick bread I called Catoctin Mountain Apple Cranberry Bread in honor of the fun trip. I based it on a wonderful recipe for Blueberry Tea Bread that was featured in the Severna Park Farmer’s Market 20th Anniversary Cookbook. I switched out the blueberries in the original recipe for apples and cranberries, added a touch of yogurt and changed the spice. A bit of prep work is required but it’s simple to make. Here’s the recipe:

Catoctin Mountain Apple Cranberry Bread

  • 2 cups flour (all purpose or unbleached)
  • 1 cup sugar
  • 4 teaspoons baking powder
  • 1/4 teaspoon salt
  • 1 cup diced apple (preferably slightly tart ones like Winesap or Granny Smith)
  • 1/2 cup fresh or frozen cranberries sliced in half
  • 2 eggs
  • 1 cup milk
  • 3 tablespoons canola oil
  • 1 tablespoon yogurt
  • Between 1/4 and 1/2 teaspoon grated lemon or orange peel
  • Dash of cinnamon and/or nutmeg

Assemble and stir together dry ingredients including 2 cups flour, 1 cup sugar, 4 teaspoons baking powder and 1/4 teaspoon of salt. Then prepare the fruit.

Slice the cranberries in two until you have half a cup.

Stir fruits into the dry ingredients until well blended. Then whip eggs, milk, grated lemon rind and a dash of cinnamon together, pour into the dry mixture, and stir to combine.

Pour batter into a lightly-greased 9×5-inch loaf pan. Bake at 350 degrees until a toothpick inserted in the center comes out clean. Remove from the oven and cool on a rack for 10 minutes.

Then invert to remove from the pan, place on a serving plate or wooden board to cool completely and lightly sprinkle with confectioner’s sugar

My experiment to transform the farmer’s market recipe for Blueberry Tea Bread to my own more autumnal Catoctin Mountain Apple Cranberry Bread worked. The contrast between the cinnamon flavored dough, mellow apples and tart cranberries was wonderful. I served the bread for brunch following omelets. It was so good that everyone wanted a second piece.

If you enjoy traditional and family recipes from Sharon Lee’s Table click the subscribe button below for updates.

Summer’s bounty yields Marco Ridge Farm blackberries for an elegantly simple dessert

Last year, peaches from Oxford, Maryland inspired me to recreate my grandmother’s Perfectly Peachy shortcake recipe (http://www.sharonleestable.com/oxford-peaches-inspired-old-fashioned-desserts-on-the-porch/ ) .

This year, plump, juicy blackberries from the rolling fields of Marco Ridge Farm in Davidsonville, Maryland were the inspiration for another old-fashioned dessert. I was lucky enough to buy the last box of berries before they sold out.

Visiting local shops, farmer’s markets and farm stands is one of my favorite things to do. So, while driving through Davidsonville on Route 424, I was delighted to discover Marco Ridge Farm Produce,

Judging by the number of cars pulling in and the well-stocked tables of corn, tomatoes and other veg, I figured the stand had a loyal following. So I pulled in too.

I wasn’t disappointed. There were fat, red beefsteak tomatoes, green tomatoes and cherry tomatoes, yellow squash, zucchini, freshly picked corn, green peppers, cantaloupes, melons, sunflowers and a few precious boxes of blackberries. Pointing to blackberry stains on her shirt, one of the gals at the check-out table told me she’d just picked them.

Surrounded, on both sides of Route 424 with fields of corn as high as the oft-mentioned “elephant’s eye” and other crops, the farm is beautiful everywhere you turn.

Tomatoes and squash were producing heavily in one field while sunflowers were getting ready to burst into bloom in another. Photos by Sharon Lee Tegler
There were fields and fields of corn.

I allowed myself one last look before leaving for home with bags of corn, peppers, tomatoes, berries and a cantaloupe on the backseat of my car.

Deciding to save the corn for the next day’s dinner, I laid out some of the other produce.

Veggies and berries comprised fixin’s for dinner. Though symmetrically challenged, the cantaloupe proved one of the sweetest I’d ever tasted.

Along with herbs from pots outside my kitchen door, the tomatoes and peppers would be combined with garlic, onions and zucchini already on my cutting board for pasta with savory summer vegetables.

To protect my herbs from nibbling deer, I’ve grown some then on my porch including the sage and basil plants flanking the scarlet zinnia.

However, the bowl of blackberries captured my immediate attention. I tasted one, then two. They were scrumptious and I knew they’d be great over a simple cake. You can substitute store-bought pound cake but I like this easy-to-make version of the recipe I featured in March of 2017 for “My Mother’s Cake” (http://www.sharonleestable.com/my-mothers-cake/) .

Fond of layer cakes with chocolate icing, my mother Margaret Owings always used the recipe as written but you’ll see that I’ve split the batter into two pans (for two desserts). Here are the quick and easy directions.

My Mother’s Cake – Plain version

  • Grease and flour two 8 inch pans (I used one square pan and one round pan)
  • 1/2 cup (or 1 stick) of butter cut in pieces – margarine or shortening work too
  • 1-1/3 cups of granulated sugar
  • 2 eggs
  • 2 cups of flour (all purpose or unbleached)
  • 3 teaspoons of baking powder
  • 1/2 teaspoon of salt
  • 1 cup of milk
  • 1/2 teaspoon of vanilla

Cream together the half cup of butter with the sugar and eggs till smooth. Add both cups of flour, three teaspoons of baking powder and a half teaspoon of salt. Add half of the cup of milk and mix with the dry ingredients until blended. Lastly, add the half teaspoon of vanilla and remaining half cup of milk and mix at medium speed.

Pour the batter into greased cake pans.

(I divided the batter into two pans – the square pan for my blackberry dessert and the round one to be saved and split to fill with custard and top with chocolate icing.)

Bake at 350 degrees for approximately 30 minutes.

While the cake bakes, wash the berries and sprinkle one or two tablespoons of sugar over them depending on their natural sweetness. Fold the sugar in with a spoon and allow the berries to macerate in the refrigerator until the cake is out of the oven.

While cake cools, add one or two tablespoons of sugar to the blackberries depending on their natural sweetness.
Stir the sugar into the berries and allow them to macerate in the regrigerator.

Slice large or small pieces of cake from the square pan. Remove the berries from the fridge and spoon over the cake. For the perfect touch, add a dollop of whipped cream. Vanilla ice cream works great too.

A dollop of whipped cream or vanilla ice cream adds a perfect touch.

Enjoy!

If you like family and traditional recipes from Sharon Lee’s Table and enjoy community news from Around The Park Again, click the Subscribe button below for updates.

Butterscotch Chippies – decadent, delicious and delightfully simple to make

Back in the kitchen after many busy days, I thought it was time for a treat…..something rich but with a bit of crunch. Thus, I decided to make Butterscotch Chippies – a cookie creation I cobbled together by modifying a recipe I found in a 1960’s era cookbook.

The butterscotch flavor depends on a combination of melted butter and shortening and equal measures of brown and white sugar. The recipe is so easy, the cookies practically make themselves.

Butterscotch Chippies

  • 1/4 cup of butter or margarine
  • 1/4 cup of shortening
  • 1/3 cup of brown sugar
  • 1/3 cup of white granulated sugar
  • 1 egg
  • 1-1/2 cups sifted flour (I prefer unbleached but all-purpose is fine)
  • 3/4 teaspoon baking soda
  • 3/4 teaspoon vanilla
  • 1/2 cup chopped walnuts
  • 3/4 to 1 cup of white chocolate or peanut butter chips

Having pre-measured the brown and granulated sugars, your first step is to melt the butter or margarine and shortening together in a saucepan and pour into your mixing bowl. Add both cups of sugar and mix well. Add the egg and beat until lighter in color and frothy.

Combine the flour and baking soda and add to your mixing bowl. At this point, you can switch from using a mixer to mixing by hand.

You’ll next add the vanilla followed by the walnuts and white chocolate or peanut butter chips. (The white chocolate chips taste great but I love the peanut butter ones even better for that extra bit of richness.)

Using a lightly greased cookie sheet (mine is old and disreputable in appearance but bakes perfect cookies) scoop out even portions of dough. I prefer to use a small, round scoop but you can also use a teaspoon and then shape the dough into balls. Place into a 375 degree oven (middle rack) for 7 to 10 minutes watching carefully. Remove at once.

Relatively small and dainty, the cookies look as appealing as they taste when placed on a pretty plate and surrounded by a favorite cup or two for coffee or tea. The rich butterscotch flavor combined with melt-in-your-mouth peanut butter chips and a crispy texture, delight the taste buds while lifting the spirits.

Amaranth leaf salad with herbed balsamic vinaigrette – simple and refreshing for late summer days.

When friends unfamiliar with my gardening hobby come to call, I sometimes serve homegrown Amaranth leaf salad as a side dish. The beautiful magenta-tinged leaves of the Red Leaf Amaranth plant are mature enough by early summer to use as a stand-alone salad or mixed with other greens. Because they are not sold in grocery stores or even at produce stands, no one has a clue what the colorful greens are. Thus, I often refer to this dish as my “Mystery Salad”.

I only recently found I could grow Amaranth….. which I first discovered as a “seed or grain” that I use when baking cookies to add a crunchy texture. It also provides an extra depth of flavor when added to pancake or muffin batters.

Grown historically by the Aztecs, gluten-free Amaranth is high in protein , vitamins and minerals. I grow it in pots outside my kitchen door rather than in my garden where it can be nibbled by deer. The plants produce leaves, flowers and nutritious seeds similar to buckwheat and quinoa from May through October.

Growing Amarinth is easy and fun with a profusion of colorful leaves for salads or cooking along with flowers and nutritious seeds similar to buckwheat or quinoa.

Similar in taste to arugula but more delicate., the leaves are delicious in salads on their own or combined with Green Leaf or Romaine lettuces and/or red onion, red pepper, cucumber, radishes or cherry tomatoes. The greens are best when combined with an herbed Balsamic vinaigrette that’s simple to whip up.

Herbed Balsamic Vinaigrette

  • 2 Tablespoons extra virgin olive oil
  • 3 Tablespoons balsamic vinegar
  • 1/2 Tablespoon water
  • 1/4 teaspoon of sugar or to taste
  • Healthy dollop of Dijon mustard
  • 1 large or two small garlic cloves chopped
  • 2 or 3 stems of thyme stripped from stem
  • 2 stems of flat leaf parsley – torn
  • 2 leaves of basil – torn
  • 2 stems of chives – chopped

Whisk together olive oil, balsamic vinegar, water, sugar, and the dollop of Dijon mustard. Add herbs, whisk again and allow the herbs to steep for a few moments before serving.

Simply layer the leaves, add some cat mint blossoms or other edible flowers and set the dressing out for guests to drizzle. I like to serve the salad as a compliment for casseroles made from richly sauced chicken or turkey and porcini mushrooms.

Forrest’s easy chops for two

Known to his friends as something of a globe trotter, Forrest Terrell loves to travel. But, when at home in Annapolis Maryland, he enjoys cooking and listening to jazz – usually simultaneously.

A widower since 2007, he enjoys heading to the West Coast to take in jazz events or visit family….. or indulging in long-dreamed of trips. He’s visited India, Russia, China, Japan and Thailand.

He first developed a taste for travel on work-related trips . But the international travel bug bit when he and his late wife Claire celebrated an anniversary in Rio de Janeiro. Subsequent trips to Budapest, Prague and Vienna in honor of Claire’s Hungarian heritage were followed by a trans- Atlantic cruise ending in London. Between trips, Forrest satisfied his wanderlust through travel to Amsterdam as a courier delivering documents and participating in educational adventures including a wildlife expedition to Kenya.

His culinary adventures began of necessity when Claire – a magnificent cook with a flair for entertaining – passed away. Fortunately, she left an immense book of recipes behind – a veritable treasure trove of good things to eat – that Forrest relies on.

Preferring to make simple dishes using the freshest ingredients and best meats, he’s chosen a recipe called 1+1+4+4 Pork Chops to share with us. They are quick, reliable and easy to make whether serving two or four people. We’ve chosen to prepare the recipe for two.

1+1+4+4 Pork Chops

  • 2 one-inch pork chops (boneless or bone-in as mine were)
  • Salt, pepper or fresh herbs to taste (I added a bit of fresh thyme and rosemary)
  • 1 Tablespoon of oil if needed (optional)

Forrest emphasizes that a one-inch chop is crucial to the success of the technique of searing the meat to seal in the juices and cooking through in a prescribed amount of time to retain moisture and tenderness. He buys his at The Amish Market in Annapolis.

Place your 1-inch thick pork chops on a plate or non-wooden cutting board. Pat them dry and lightly salt and pepper. I chose to add a bit of fresh thyme and rosemary from my garden.

Preheat the pan in which you are going to cook the chops. If using a cast iron skillet like the one I chose, heat the pan until a droplet of water sizzles on the surface. You may add up to 1 Tablespoon of olive or vegetable oil if you feel it is needed. Add the chops.

Over high heat, brown the first side of the meat for exactly 1 minute. Turn and cook exactly one minute more. Turn the chops again , reduce the heat to low and cover the pan. Cook for 4 minutes. Turn the chops for a final time and cook 4 more minutes.

Transfer the pork chops to a cutting board . Cover and set aside to rest while you prepare your side dishes. (Once they’ve rested, they may be sliced or not.) I like to serve them with roast potato slices Sharon Lee style along with Brussels Sprouts and green peas. The sprouts are steamed in a saucepan with an inch and a half of water, a drizzle of extra virgin olive oil, a pinch each of sugar and red pepper flakes, salt to taste and a squeeze of lemon juice. The potatoes are a simple creation of my own that require a bit more work. Here’s the recipe.

Sharon Lee’s Roasted Potatoes

  • 2 medium to large potatoes washed and sliced (skin on)
  • 2 Tablespoons of extra virgin olive oil combined with fresh thyme, parsley and sage
  • Salt and/or pepper to taste

Preheat oven to 400 degrees. Combine 2 Tablespoons of olive oil with torn leaves of thyme, parsley and sage. Lay potato slices on a cookie sheet. I use an old standby that’s not pretty but works great. ( If you have a nicer cookie sheet that you’d like to use you can cover it with aluminum foil.) Coat with olive oil mixture. Place in oven to roast and watch carefully. Cook between 7 and 9 minutes on one side. Flip to other said and cook another 7 to 9 minutes. (Both sides will then be golden brown.) Remove from oven and serve.

Forrest serves his pork chops with one of two sauces

Bourbon and Mustard Sauce

  • 1/2 cup bourbon (or other whiskey)
  • 1/4 cup Dijon Mustard
  • 2 Tablespoons honey or to taste
  • 1 teaspoon Worcestershire sauce
  • black pepper to taste

Deglaze the pan in which you cooked the chops by adding the 1/2 cup of bourbon and stirring for l minute. Reduce heat to low and add mustard, honey Worcestershire and pepper and cook, stirring, till warmed through.

Apple Cider Pan Sauce

  • 1/4 cup apple cider vinegar
  • Salt and pepper to taste

Simply deglaze the pan in which the chops were cooked with the cider vinegar and cook over medium heat, stirring from the bottom, until the sauce is reduced and thickened. Add salt and pepper.

I chose the latter recipe and set the table and poured a couple glasses of wine while it reduced. Then I retrieved my resting chops, plated them with the vegetables and pulled up a chair. They were delicious!

Many thanks to Forrest Terrell for his delicious 1+1+4+4 recipe for pork chops. They were served with Apple Cider Pan Sauce on the side, roasted potatoes, Brussels Sprouts and green peas. Yummy.

Pocketbook Cookie recreation – Trial and many errors

A seldom-made but wonderful childhood treat were the raisin-filled Pocketbook Cookies baked by my late mother Margaret. Out of the blue one day, I remembered them. They’d been fun to make because they resembled tiny pocketbooks. But I hadn’t tasted them in years.

Eager to bake some, I discovered I didn’t have a recipe for them among my family favorites. In my cookbooks I found recipes for dainty filled cookies called Rugelach and Hamantaschen… but nothing resembling the sturdy “pocketbooks” I craved.

Finally, I asked my sister Barbara to check her recipes. Eureka! She found a written list of mom’s Pocketbook Cookie ingredients …but without any instructions. Nevertheless, I determined to recreate those cookies… which proved quite a challenge with lots of experimentation and many mistakes. Preparing a cookie dough came first.

Pocketbook Cookies

Sugar Cookie Dough

  • 3 1/2 cups flour (unbleached is good)
  • 1/2 teaspoon salt
  • 2 teaspoons baking powder
  • 1 teaspoon baking soda
  • 1-1/2 cups sugar
  • 1/2 cup shortening or butter
  • 1 egg (beaten)
  • 1/3 cup milk
  • 1 teaspoon vanilla

Step one was to cream together the butter, sugar, beaten egg and teaspoon of vanilla. For step two, I combined the flour, salt, baking powder and baking soda together in a separate bowl;. Then I folded the dry ingredients slowly into the creamed mixture using a wooden spoon. Step three was adding the 1/3 cup of milk.

I next used my hands to gather the dough into a ball , covered it with plastic wrap and put it in the refrigerator to firm up.

With the dough cooling its heels, I turned to making the filling. Here’s the recipe.

Raisin Filling

  • 1/2 cup sugar
  • 1 Tablespoon Flour
  • 1 cup chopped raisins
  • 1/2 cup water
  • 2 teaspoons of lemon juice
  • Vinegar???
  • 2 tablespoons of butter

Note that there are question marks by the ingredient vinegar. I have no idea if this meant you could substitute vinegar for lemon juice or add vinegar in some undetermined amount. You may wish to experiment but I chose to ignore it..

I began my filling by chopping raisins, placing them in a saucepan and adding the 1/2 cup of sugar, 1/2 cup of water and tablespoon of flour.

Squeezing lemon juice came next. (Half a lemon made two teaspoons worth.) I added the juice, followed by the butter, cooking them over medium heat. .

It’s necessary to keep stirring the filling as it begins to caramelize and thicken. When sufficiently thick, let the filling cool.

Time to retrieve the dough from the refrigerator, divide it in two, roll it into a ball to flatten it and roll it out on a floured surface. This dough rises considerably as it bakes so roll it out fairly flat.

Mistake #1 – The dough is sticky so I had to keep flouring my fingers, the rolling pin and marble surface I was using.. Through experimentation I found it better to roll it out between two sheets of plastic wrap.   

Mistake # 2 was using a beer glass as a cookie cutter. In the oven, they puffed up and became huge even when folded in half.

And then, of course, it was time to place the cookies on a cookie sheet and fill them. Thus, I grabbed by favorite old tried and true cookie sheet to which cookies never stick.

I filled the cookies with 1-1’2 teaspoons of filling – a bit too much – and folded them over like a pocketbook. Then remembering that, as a child, I’d seen my mother crimp them with the tines of a fork, I did the same…badly

Mistake #3 – I missed seeing my sister’s note to “grease” the cookie sheet and bake the cookies at 375 degrees for 10 to 12 minutes. Mistake #4 – I bore down too hard on the tines of the fork while crimping. Consequently, my cookies stuck, baked too long and looked more like seashells that pocketbooks.

For my first batch, the cookies were huge, a little overdone and leaking filling. So it was time to try, try again.

For my second batch, I used a water glass to cut the cookies out, achieving smaller circles of dough. I reduced the amount of filling to 1 teaspoon and learned how to best pinch them together. I also used a lighter touch crimping them with the fork tines. However, they still puffed up when baked and didn’t look like my mom’s.

I reverted to cutting my final batch of cookies out with a juice glass. Success at last! 

They were the right size and almost resembled my mom’s.

And they were delicious….no matter which size!

Mid-November harvest yields pumpkins for “Grandma Owings’ Pumpkin Bread”

We’ve had a warm autumn so I’m not quite prepared on November 10th when  the weather report calls for the first frost to occur overnight.  By afternoon, the temperature is  already dropping so I head for my garden to harvest herbs, collards and a veritable  bounty of green tomatoes.  I also grab some “pie variety” pumpkins.

I’ll dry or dehydrate the herbs  on trays in the  refrigerator while I spread my  green tomatoes out on the marble counter to ripen or be used “as is” in recipes.  The collards are headed for the saute pan for dinner but the  pumpkins will be turned into puree.

Smaller and more solid than the large ornamental varieties used for Halloween jack-o-lanterns or porch decorations, pie pumpkins yield a lot of bright orange flesh to puree for soups, muffins, pancakes, pies and other desserts along with  seeds for roasting.   I turn my pumpkins into puree which I divide into  8 oz. portions and freeze.   Here’s how to do it:

Pumpkin Puree

(This puree may also be made with acorn, butternut or other winter squash)

  • Wash pie pumpkins – Do not peel
  • Fill a large baking pan with 2 to 3 inches of water.
  • Add 1 large or two small pumpkins to each pan.
  • Bake at 375 degrees until done. (Rind will darken, take on a sheen…sides will collapse and flesh will be soft.)
  • Cut pumpkin in half and scoop out the seeds (rinse and save for roasting)
  • Scoop out flesh into large container
  • Use hand blender to turn the flesh into a smooth puree. Alternatively, add the flesh to a food processor or blender.
  • Divide the puree into ½ cup or 1 cup portions and use or freeze.

Pumpkins and squash are loaded with vitamins and minerals and the seeds are  nutritional powerhouses.

One of my favorite uses for pumpkin puree is to make my mother Margaret Owings’ pumpkin cake.   She dictated the recipe to me over the phone and I jotted it down in my recipe book.  I called it Grandma Owings’ Pumpkin Bread.  Whenever I make it, my kitchen smells heavenly.  Rich, moist and fragrant with spices, the bread is truly comfort food for the soul.

Mom’s recipe was “purely pumpkin” though she often added nuts.  While she generally made two loaves at a time, I prefer to make one.  I’ll improvise and toss in extra  ingredients like nuts, seeds, or raisins.  Here’s my latest version of her recipe.

Grandma Owings’ Pumpkin Bread

8 ounces (1 cup) pumpkin puree  or canned pumpkin

1-1/2 cups sugar

1/2 cup oil

1/3 cup water

2 eggs

1-3/4 cup flour

1 tsp. baking soda

1/2 tsp. salt

1 /2 tsp. cinnamon

1/2 tsp. nutmeg (or grate fresh nutmeg if you have it)

1/4 tsp. ginger

1/4 cup raisins plumped in hot water

1/4 cup unsalted roasted sunflower seeds

2 handfuls of fresh cranberries chopped

Plump the raisins by pouring scalding water over them while you assemble the other ingredients.


Combine oil and water with sugar and  and mix.  

Add eggs and pumpkin and continue to mix until frothy. 

Then add flour, the teaspoon of soda, 1/2 teaspoon of salt, 1/2 teaspoon of cinnamon and nutmeg and 1/4 teaspoon ginger.

Finish by adding a handful or two of fresh cranberries that you’ve chopped along with the quarter cup of plumped raisins and quarter cup of sunflower seeds for texture and crunch


Pour mixture into a loaf pan which you’ve  greased or oiled.  (I line the bottom of the pan with parchment paper so the loaf comes out easily.)  Bake at 350 degrees for 50 or 60 minutes.


The aroma of the baking bread is amazing.  You’ll know it’s done when it’s golden brown and firm to the touch..   Remove the loaf from the oven and allow to sit for five minutes.


Then turn it out on a cooling rack.  When cool, sprinkle with confectioner’s sugar.


The final step complete, move the loaf to a pretty plate or tray and find a serrated knife for slicing.  
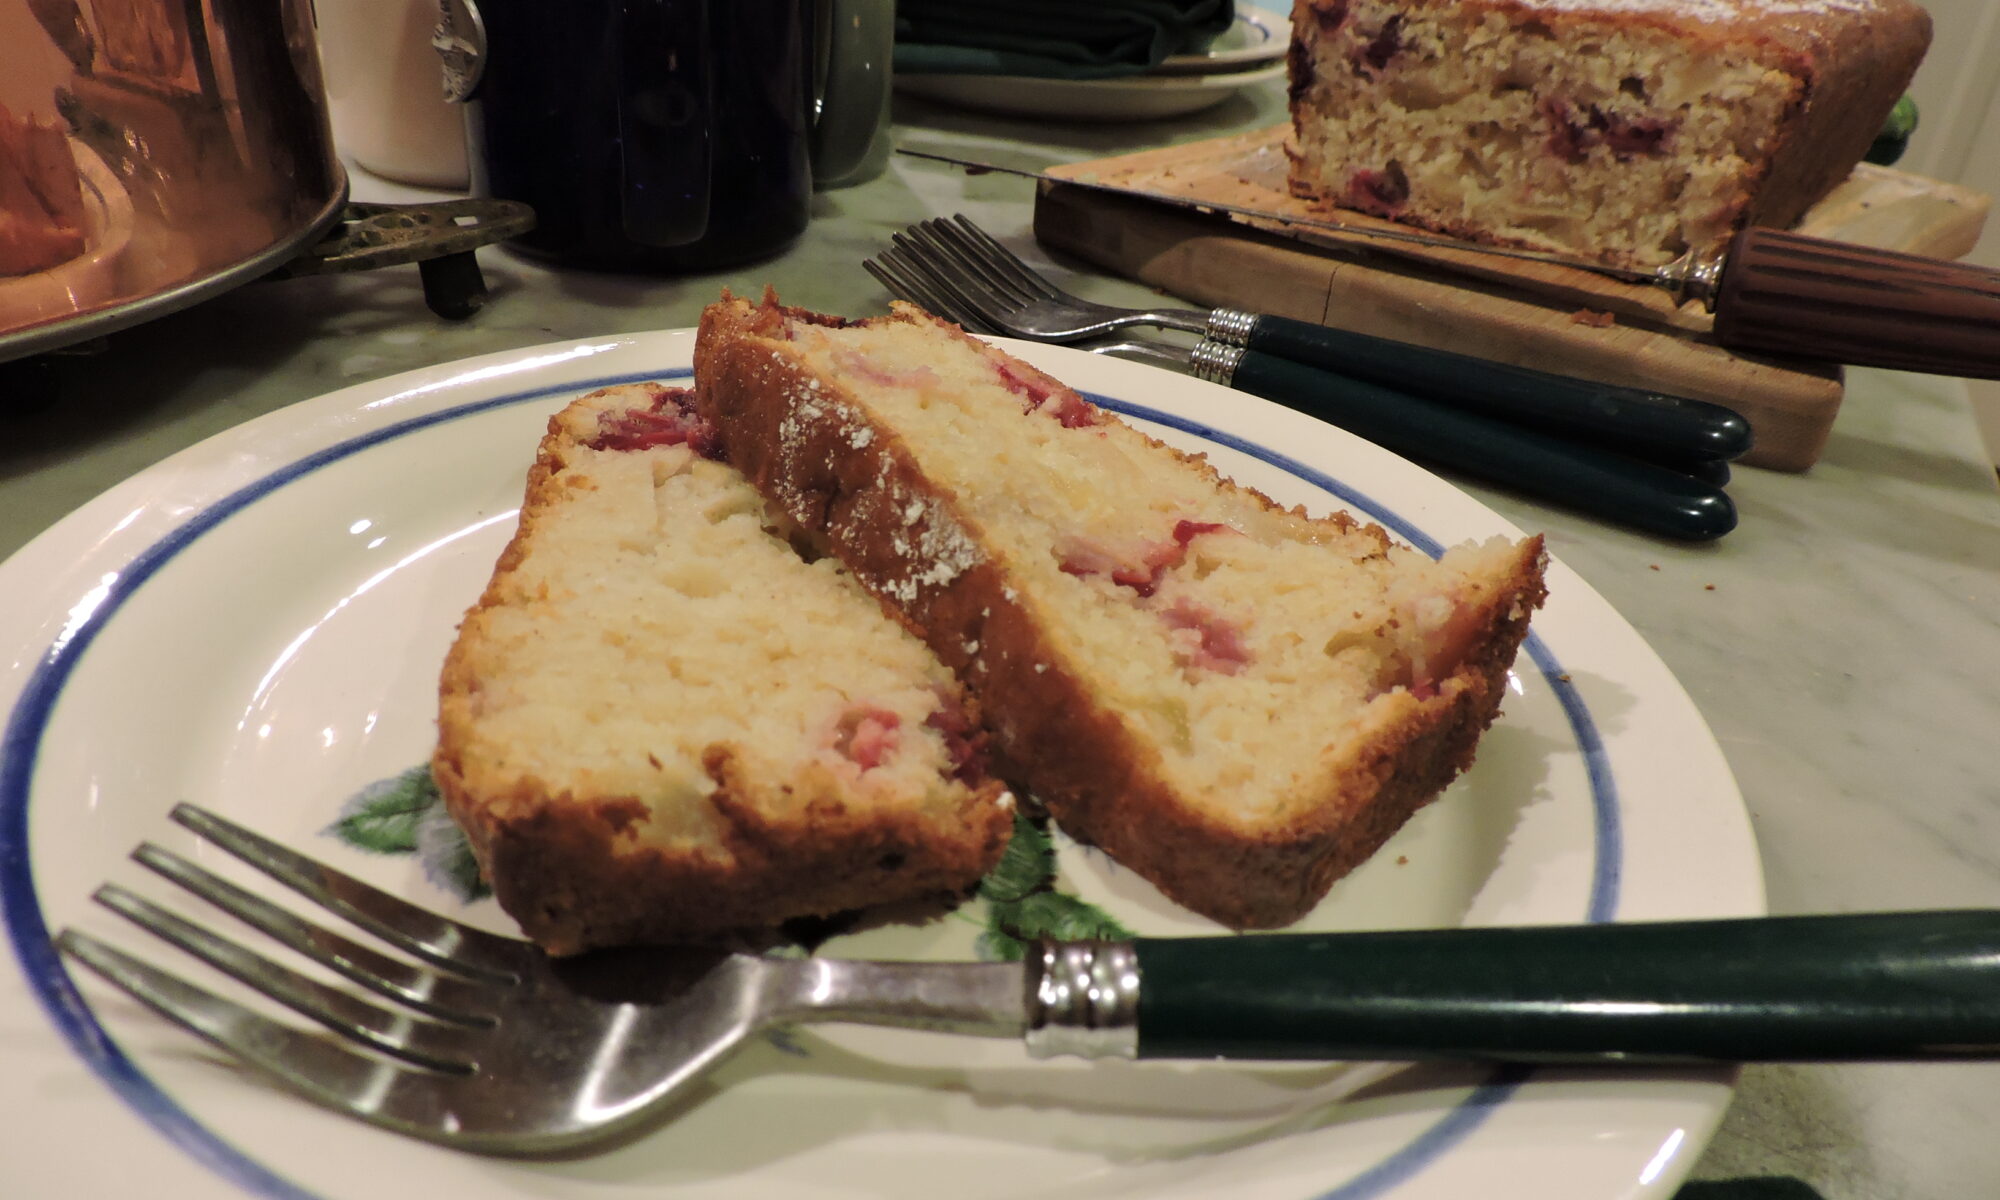
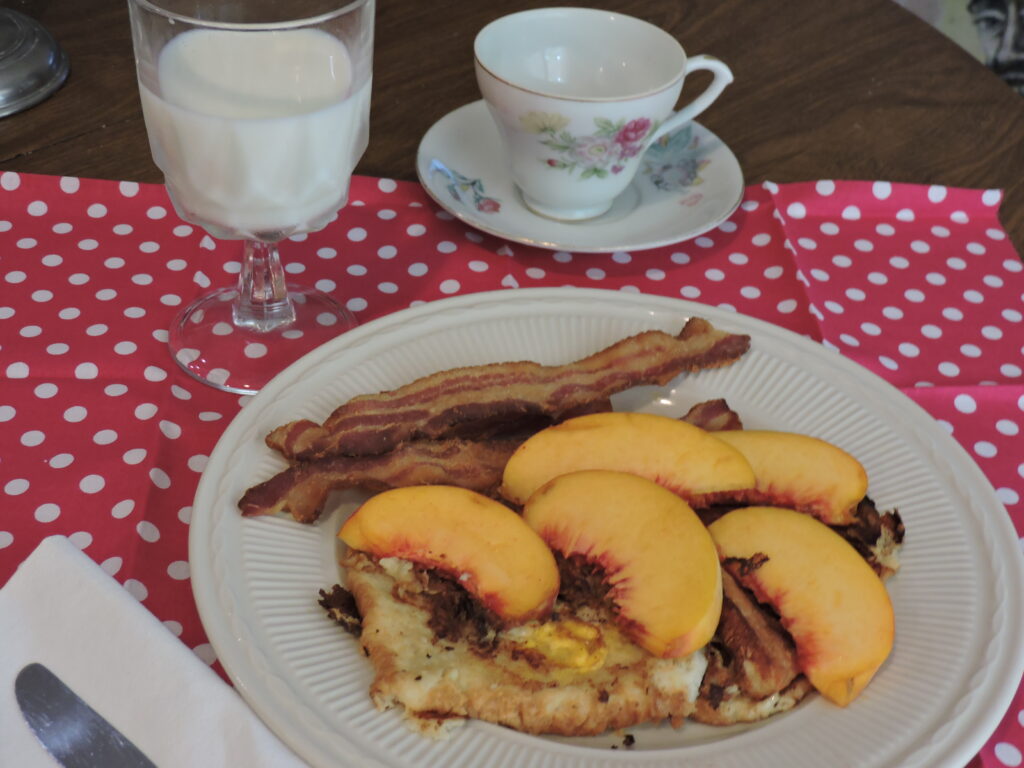
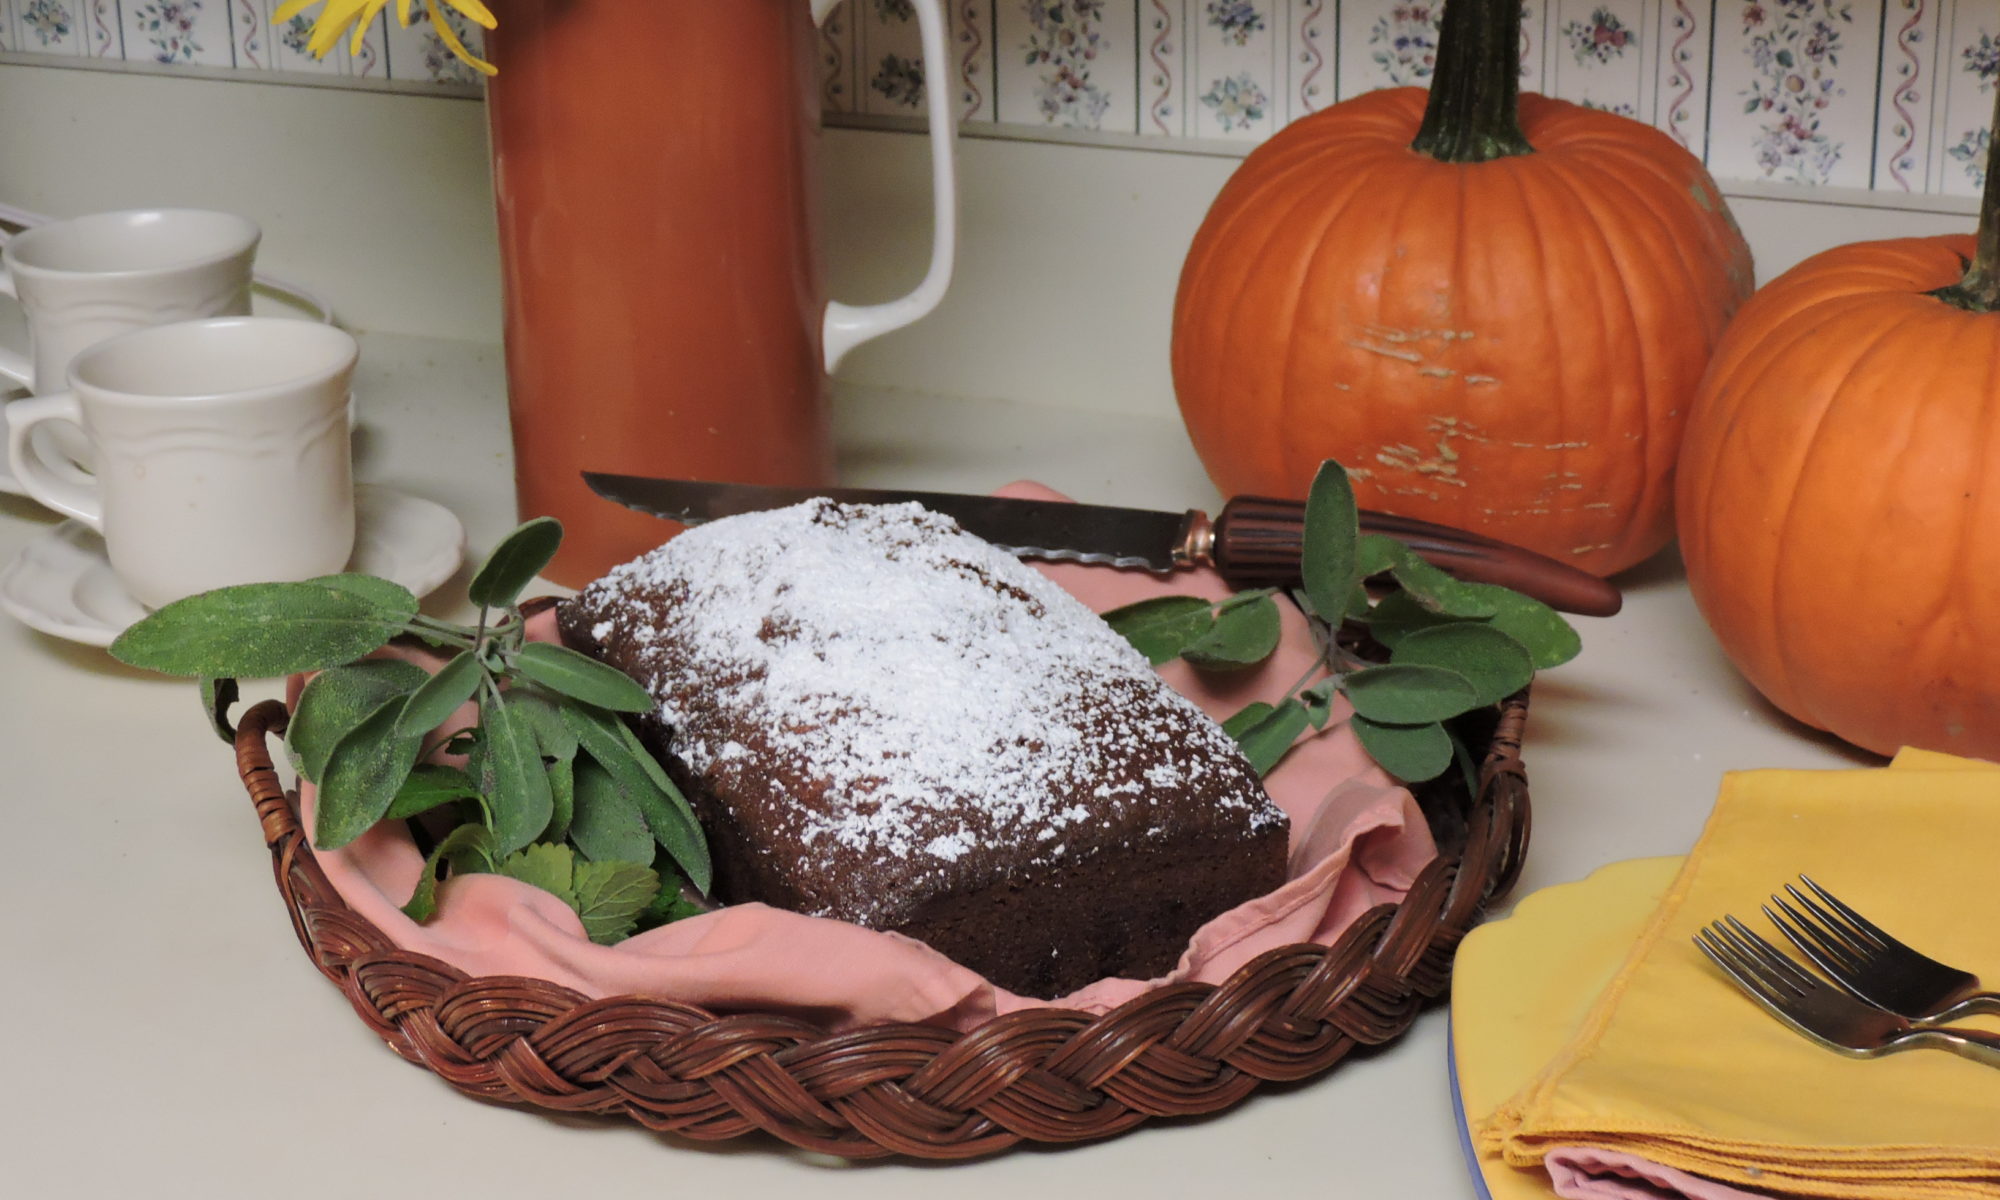
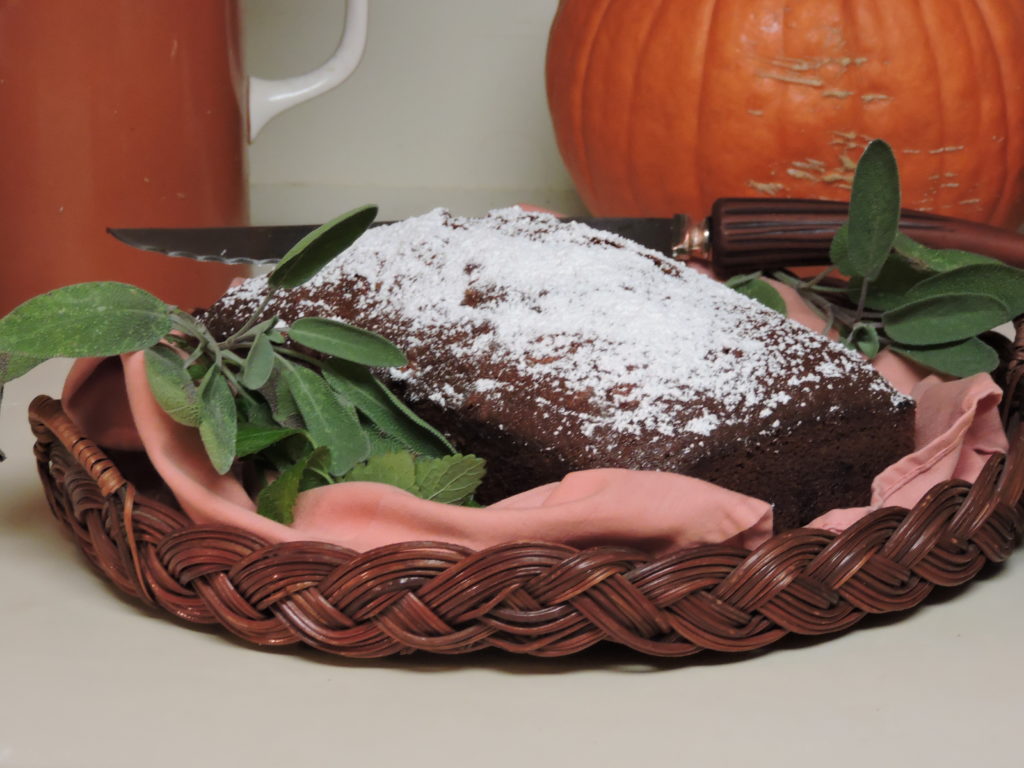
Offer slices to your family and friends with a glass of milk or a cup of coffee or tea.  They’ll likely ask for seconds.

Sweet…but not too sweet…. and richly flavorful with sunflower seeds for crunch and  fresh cranberries to add  a hint of tartness, Grandma Owings’ Pumpkin Bread is a treat for the taste buds.

Having made five different pumpkin bread recipes from my cookbook collection over the years, I have to say this is the best of them.  It’s especially enjoyable during the holidays and makes a wonderful hostess gift.  Hope you enjoy it as much as I do..


Oxford peaches inspired old-fashioned desserts on the porch

What could be more magical than a trip to Oxford, Maryland on a sunny summer day?  Heading toward town on Route 333,  we were enjoying the scenery – a mix of agricultural land and waterfront estates – when a family-run farm stand called Taylor’s Produce popped up.  The opportunity to buy fresh-from-the-fields corn, tomatoes, squash, peppers and melons was too good to pass up.  The corn looked great and was going for $6 per dozen ears. But it was the heavenly scent of peaches right off the tree that drew me like a bee to honey. 

I buzzed right past the other produce and purchased some with visions of the peach shortcakes my grandmothers used to make. 

Arriving in Oxford moments later, the trip that began with an offer to treat sons Eric and Jan to a birthday lunch at a restaurant of their choice turned into an all-day adventure. 

Once a colonial port, the tiny Eastern Shore town on the southern bank of the Tred-Avon River fell out of use after the American Revolution and became the town that time forgot.

A stroll through four-century-old streets took us past some lovely old homes  – a few dating to the 1700’s.  Set against the backdrop of the river,  several homes could only be approached down shady lanes like Swan’s Way or behind picket fences like River House.  Gardens surrounding a majority of the well-kept residences were fully in bloom and beautiful.  Historic buildings still in use  included a market, a museum, and a small library.

One of three houses of worship, St. Paul’s Wesleyan Church was originally constructed in 1865.  Known, at one time, as St. Paul’s Pilgrim Holiness Church, the structure was added to over time.

In a town surrounded by water, I assumed “fish” would star on restaurant menus but was only partially right.                                                             

 At Capsize, the beer was cold and the wings with Old Bay seasoning delicious as we spent a lazy hour or two watching weekend boaters tie up at the docks in search of the ice cream for which Oxford is apparently famous. 


Seafood was featured prominently on the Capsize menu too with Scallop Risotto an especially tasty entree.

We had more exploring to do, of course,  and another restaurant to try.  A steel band concert taking place on Sunset Grille’s outdoor deck and the tropical vibe of the place hooked us as did exotic drink specialties and seafood-based entrees.  The crab imperial stuffed mushroom caps truly tickled my taste buds.

The lasting reward to our day away was my haul of produce  – I’d gone back for corn – but especially the peaches. 

Recalling that both my grandmothers preferred their peaches straight off the tree and unadorned, I initially found a cutting board and sliced some directly into dessert dishes.

Having  invited friends to taste them, I added a few berries from my own patch 
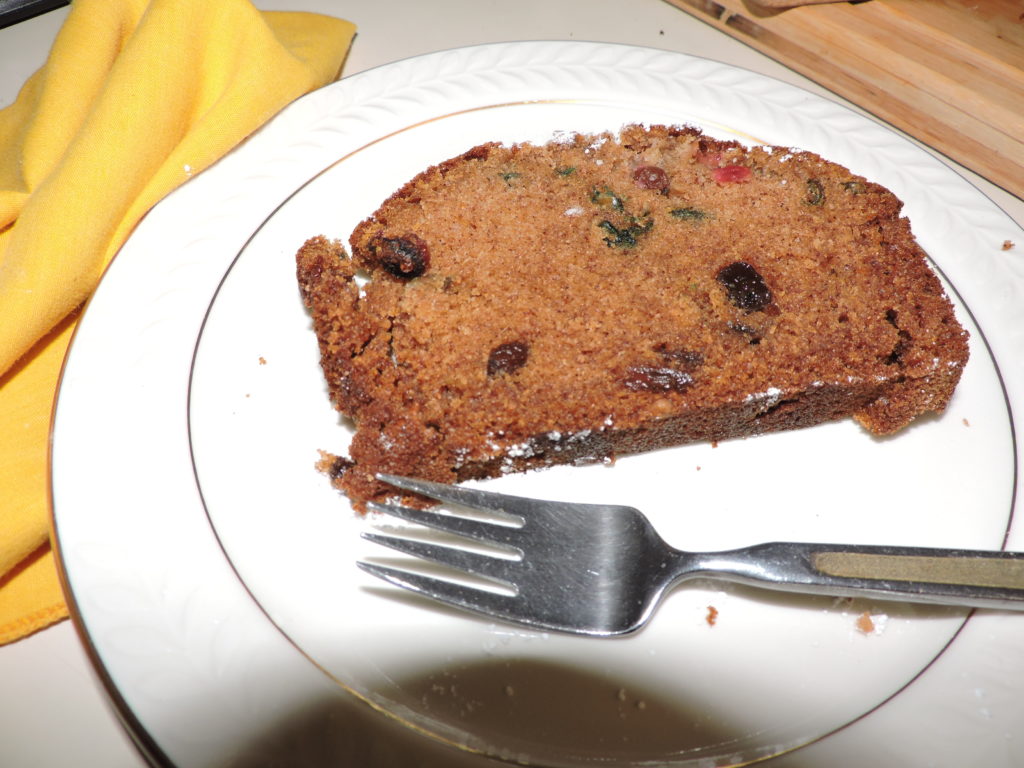
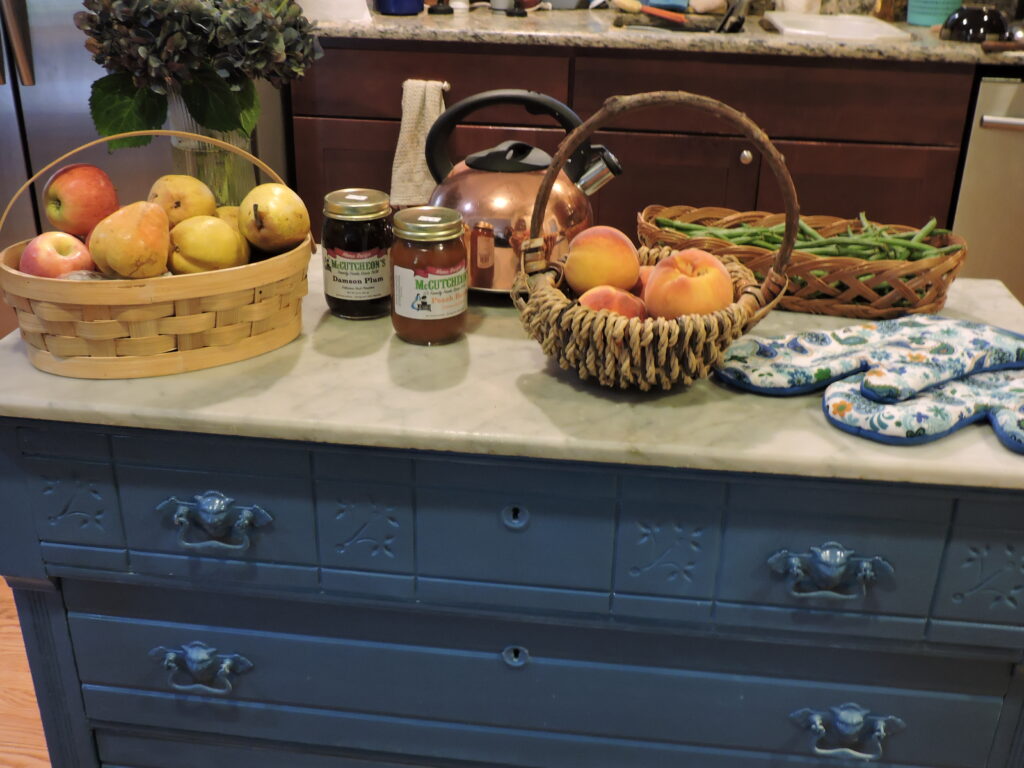
to fancy them up.  Unlike my grandmothers who sometimes topped peaches with cream straight from the cow, I offered Reddi-Whip. They were great. 
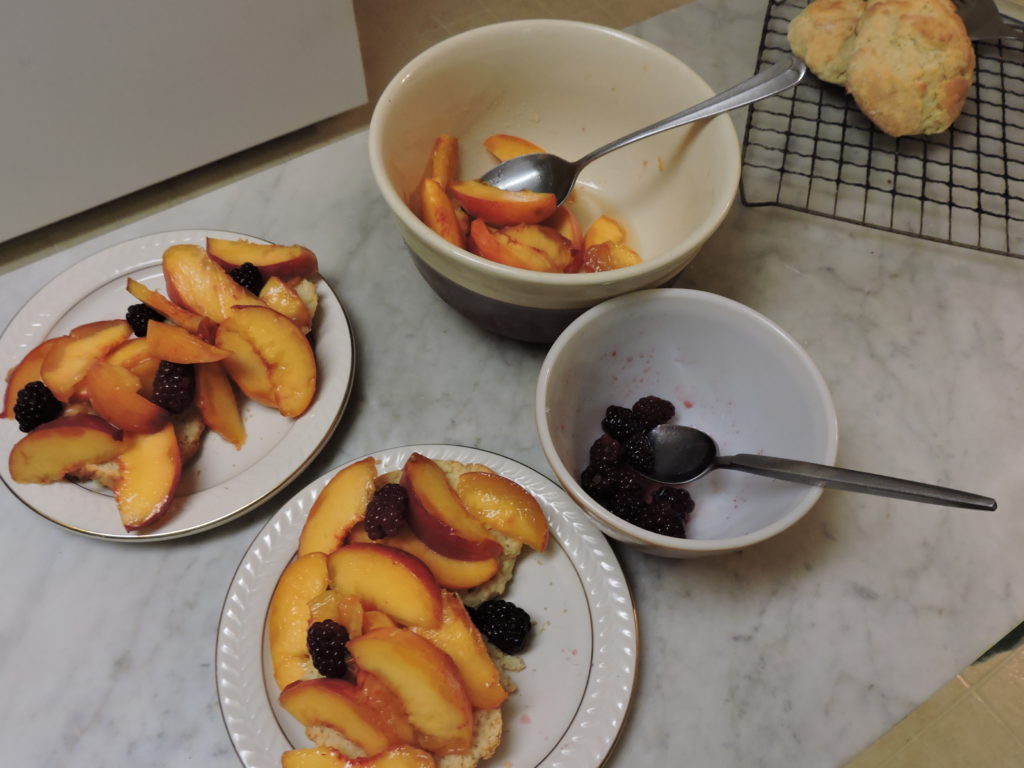
Luckily, I reserved enough peaches for that shortcake I was craving.

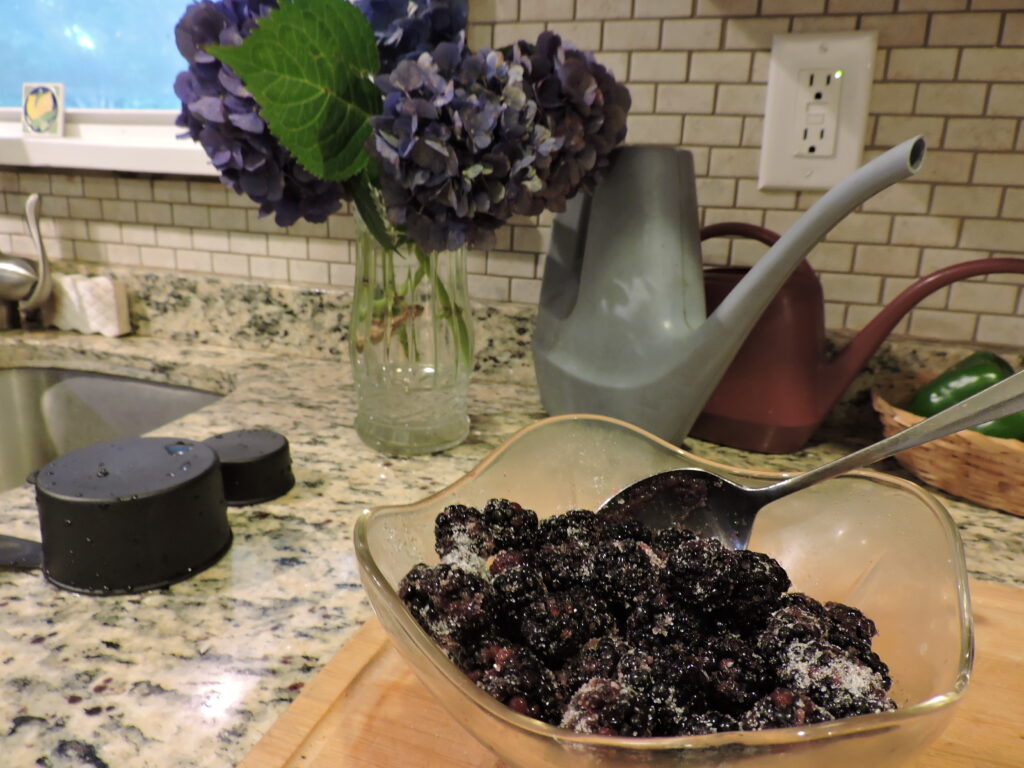
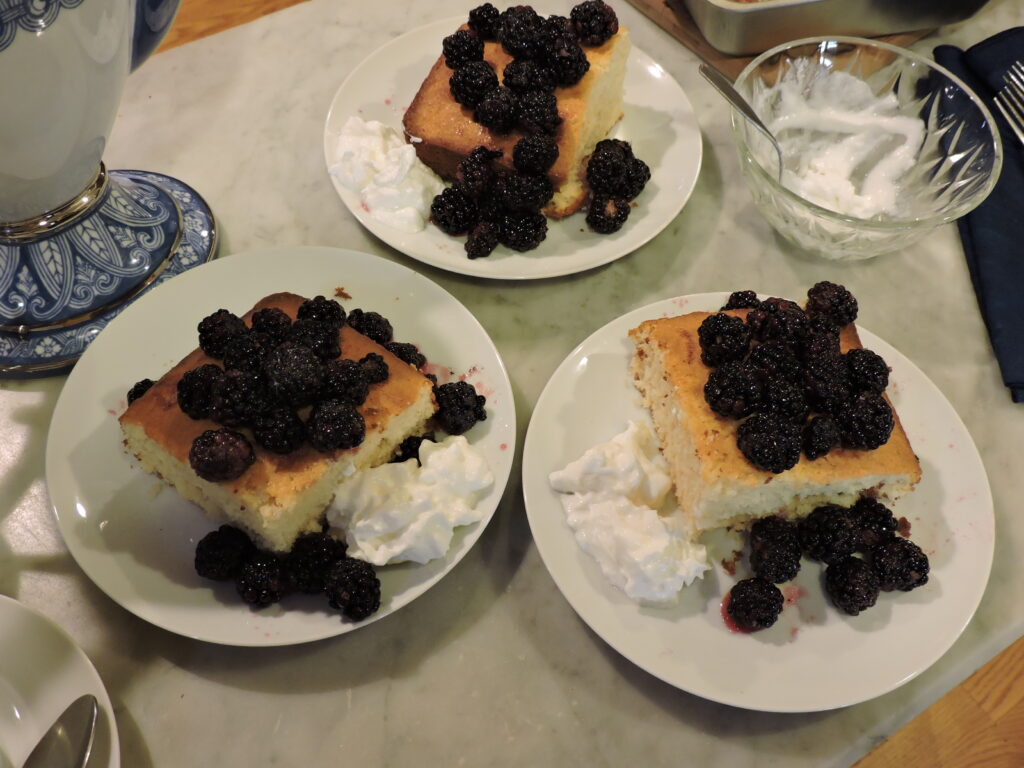
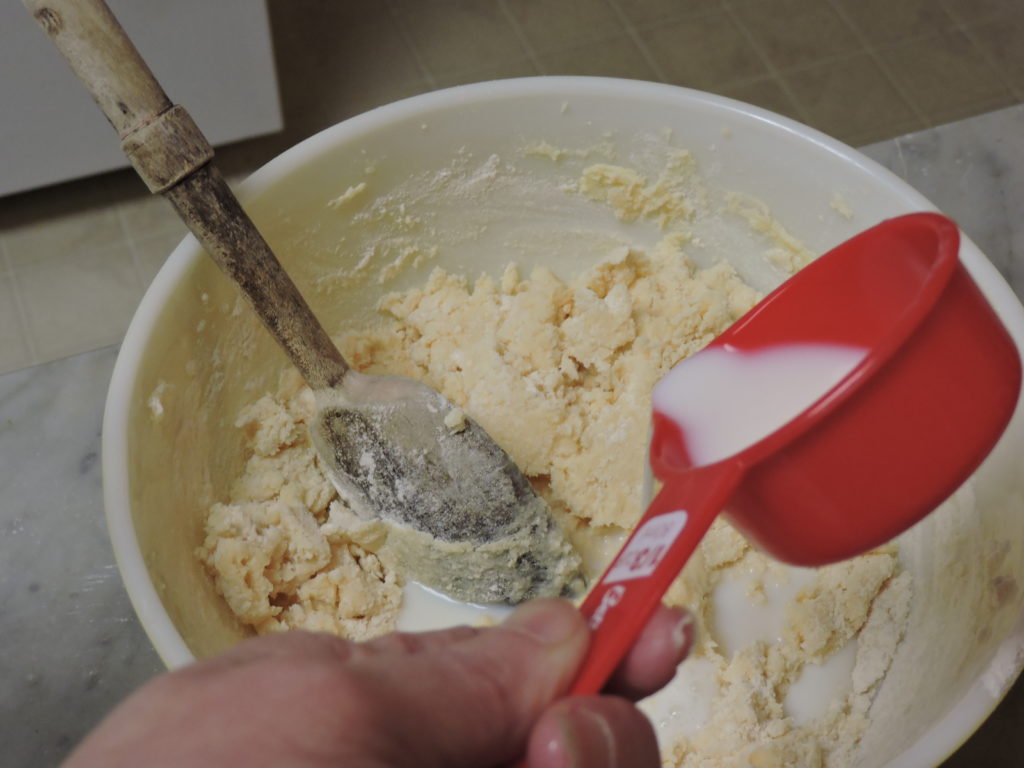
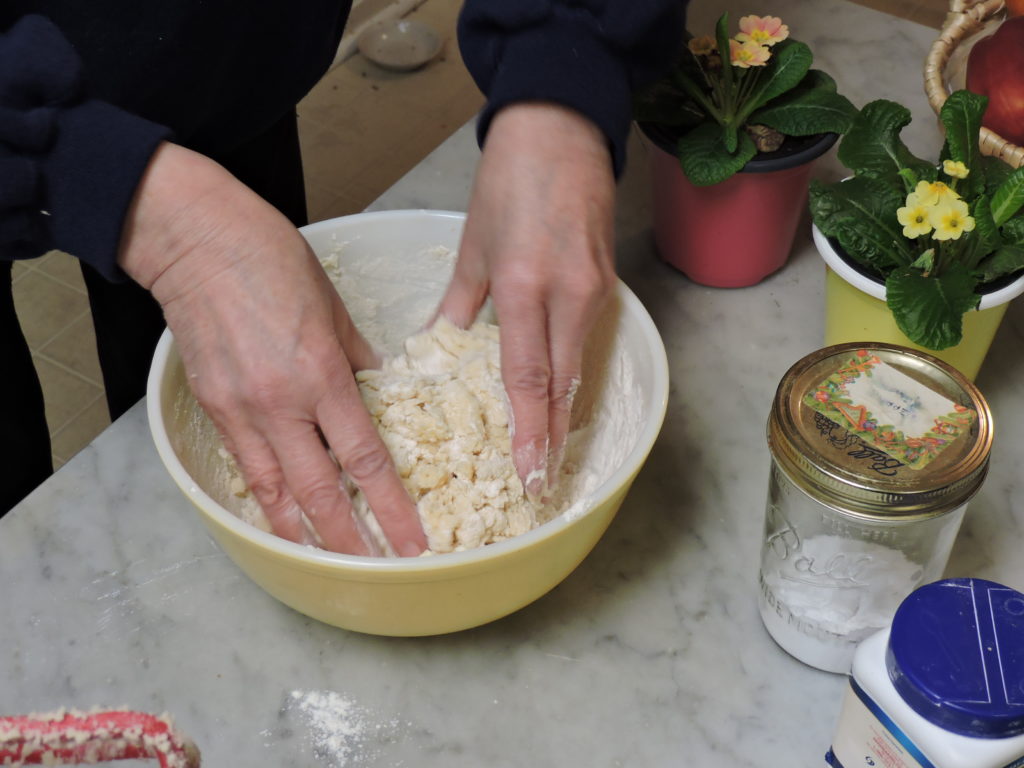
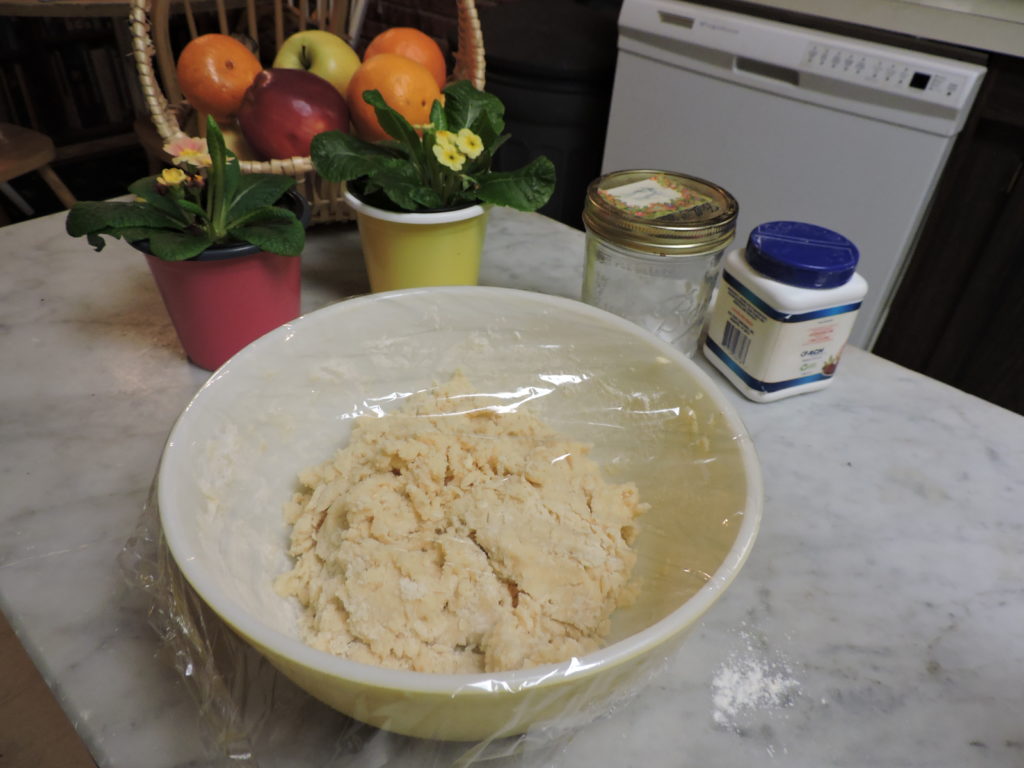
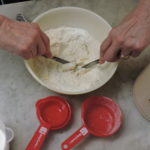
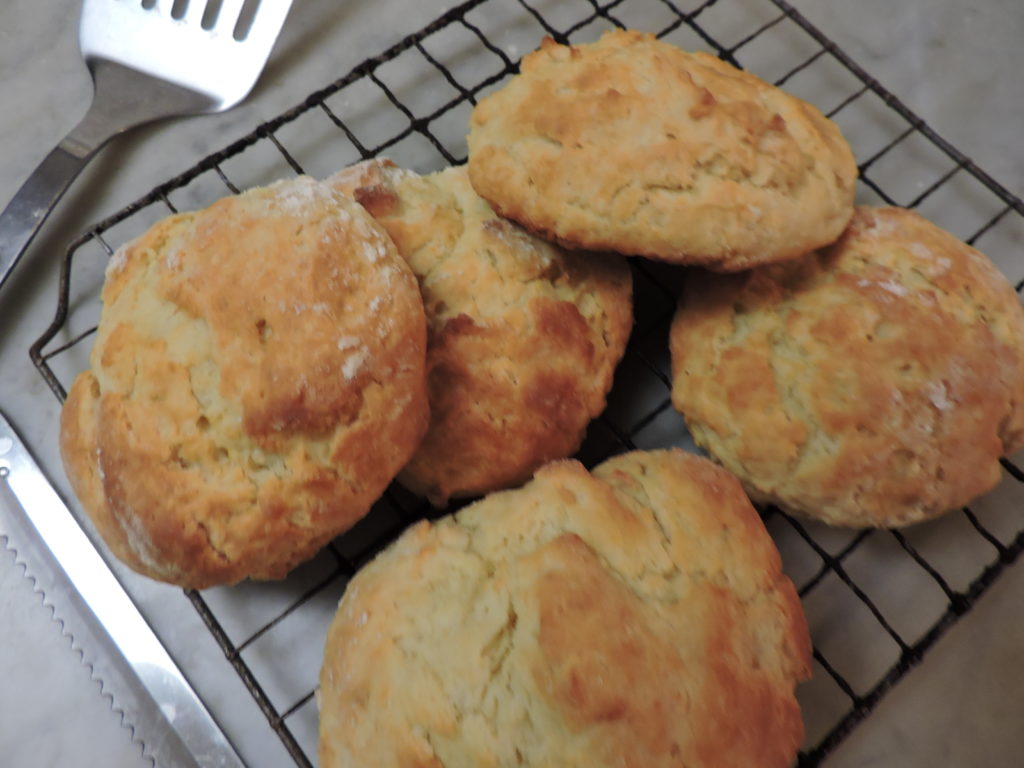
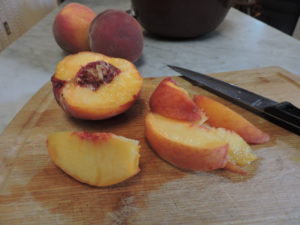
I first  prepared the peaches by slicing them into a bowl, sprinkling a tablespoon or two of sugar over the top and placing them into the refrigerator.  Then I got to work preparing the shortcake dough .  Both grandmothers’ recipes are lost in time but I believe they modeled their shortcakes on  biscuit recipes while my mother used Bisquick .  I prefer to use a recipe for a sweeter lighter biscuit I adapted from one in Lighthearted Everyday Cooking by Anne Lindsay which is still in print. 

Perfectly Peachy Shortcake

  • Between six and nine peaches depending on size with sprinkling of 1 or two Tbsp. of sugar
  • 2 cups flour (I use unbleached)
  • 2 Tbsp. granulated sugar
  • 1 Tbsp. baking powder
  • 1/4 tsp. salt
  • 5 Tbsp. softned trans fat free margarine (I like Land O’ Lakes)
  • 3/4 cup non-fat or low-fat milk

Combine flour, sugar, baking powder and salt.  Divide margarine, add to flour, and use two knives to cut butter in till mixture is crumbly. Combine with milk.

Gather dough into a ball and pat into a circle approximately 3/4 inch thick.
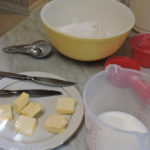
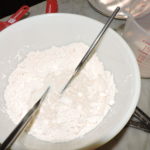
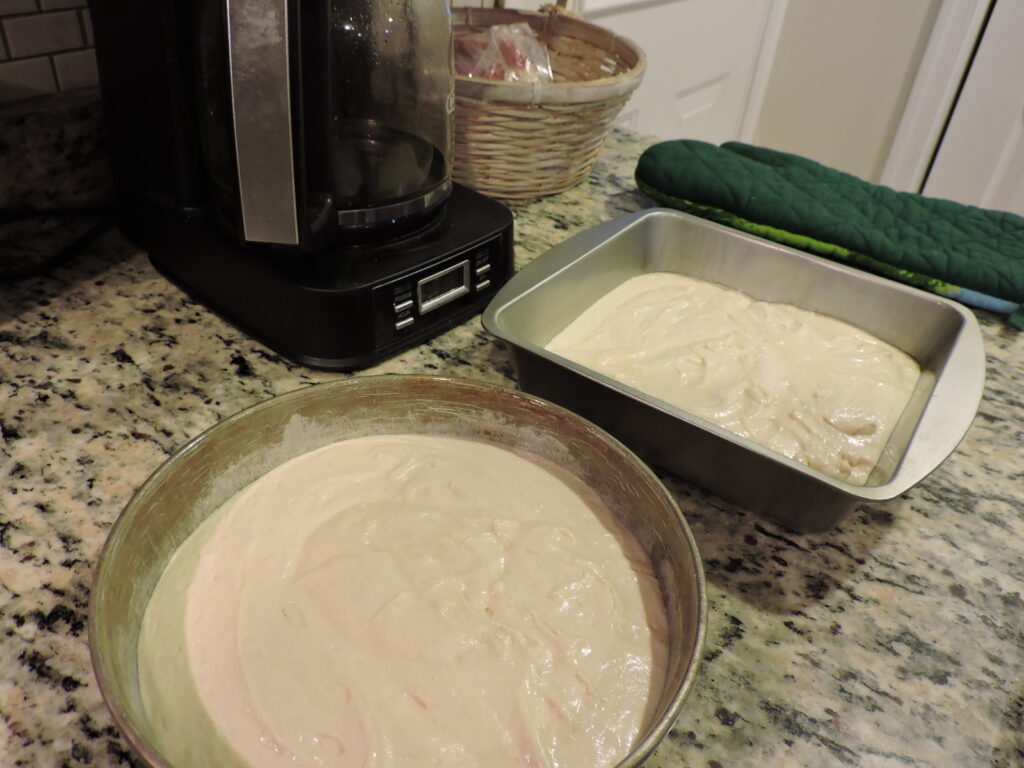
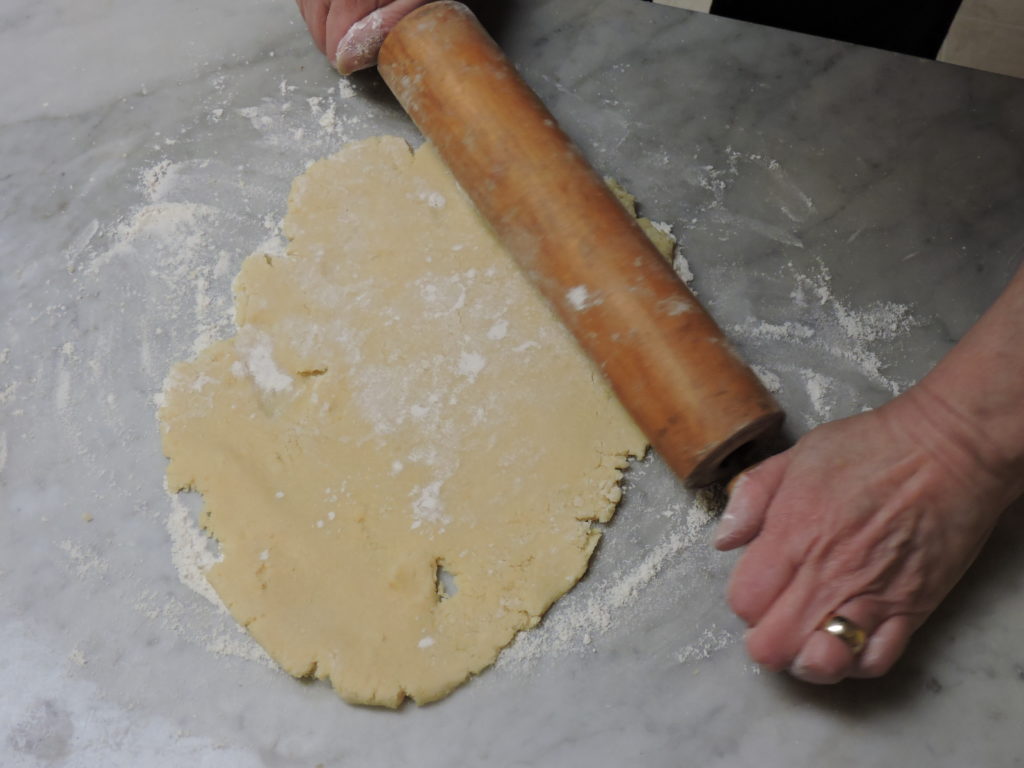
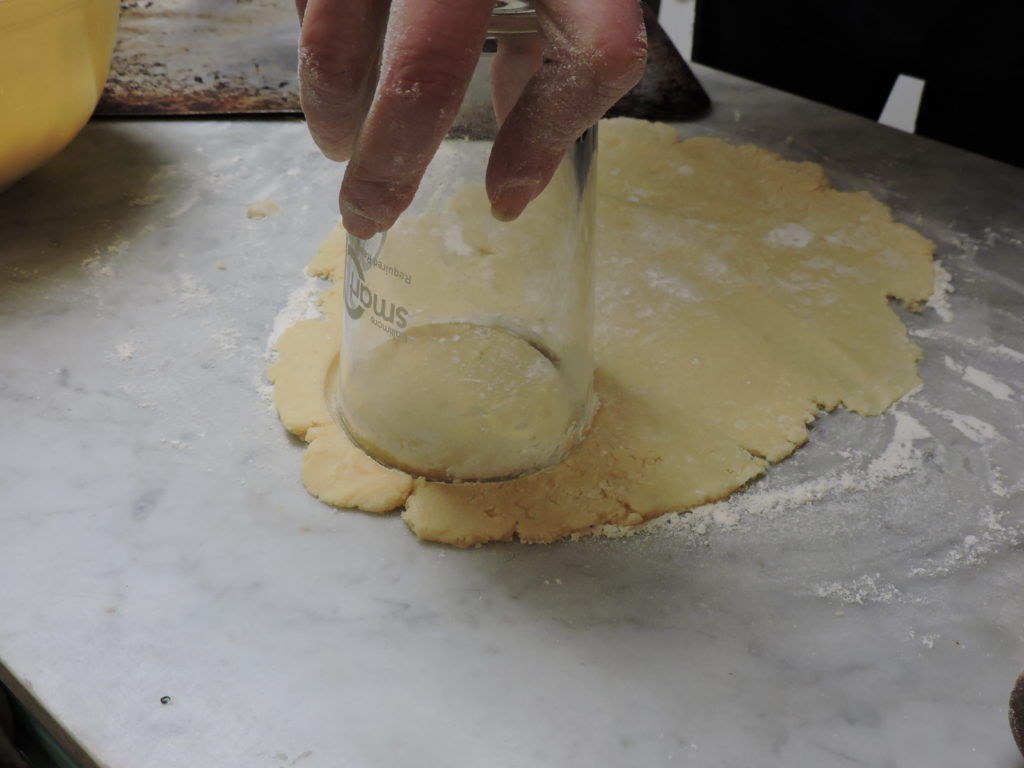
Use a three inch cutter or glass dusted with flour to make rounds of dough and place on a cookie sheet.  (I use my faithful old aluminum one.)

Bake in a 450 degree oven for 12 to 15 minutes until golden brown (though my oven runs a bit hot so I cut cooking time to 11 minutes or lower oven temperature to 440 degrees.

Cool shortcakes on a rack for 10 or 15 minutes.


Then carefully slice them in half .

Spoon sweetened peaches over each half and and garnish with juicy blackberries. (Makes six to eight desserts.)

Though old fashioned, Peach Shortcake on the porch on a summer night is delightful. My taste testers gave it an A-Plus.


Triple Crown racing season kicks off with Derby Brunch

With a grandfather, father and two uncles who were horse racing enthusiasts, it’s no wonder I have a soft spot for all three Triple Crown races – the Kentucky Derby, Maryland’s own Preakness Stakes, and New York’s Belmont Stakes.

Grandfather Robert Owings loved horses and was known to play polo in the Greenspring Valley of Maryland. He’s seen here on Doc. But I knew a later horse named Prince.

It wasn’t until my Uncle Howard attended the Kentucky Derby and brought back a cookbook as a gift for my mother, Margaret Owings, called “Kentucky Cooking, New and Old”, that I realized a tradition of good food and hospitality had grown up around the Derby.  The cookbook was compiled in 1955 by the Kentucky Colonettes of Louisville.

My mother eventually handed the cookbook on to me and I have loved it and referred to it so often that it’s literally falling apart.  I’ve always been charmed by the  mix of traditional Southern recipes,  1950’s favorites and cocktail party and V.I.P. dinner party menus.  From timetested standbys like scalloped oysters or easy meat barbecue recipes to tomato-based Rinktum Diddy, the food is delicious.  Of course, I may substitute today’s improved ingredients from time to time.

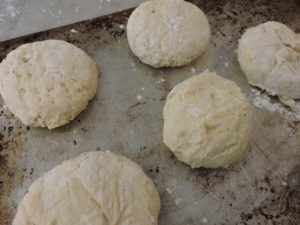
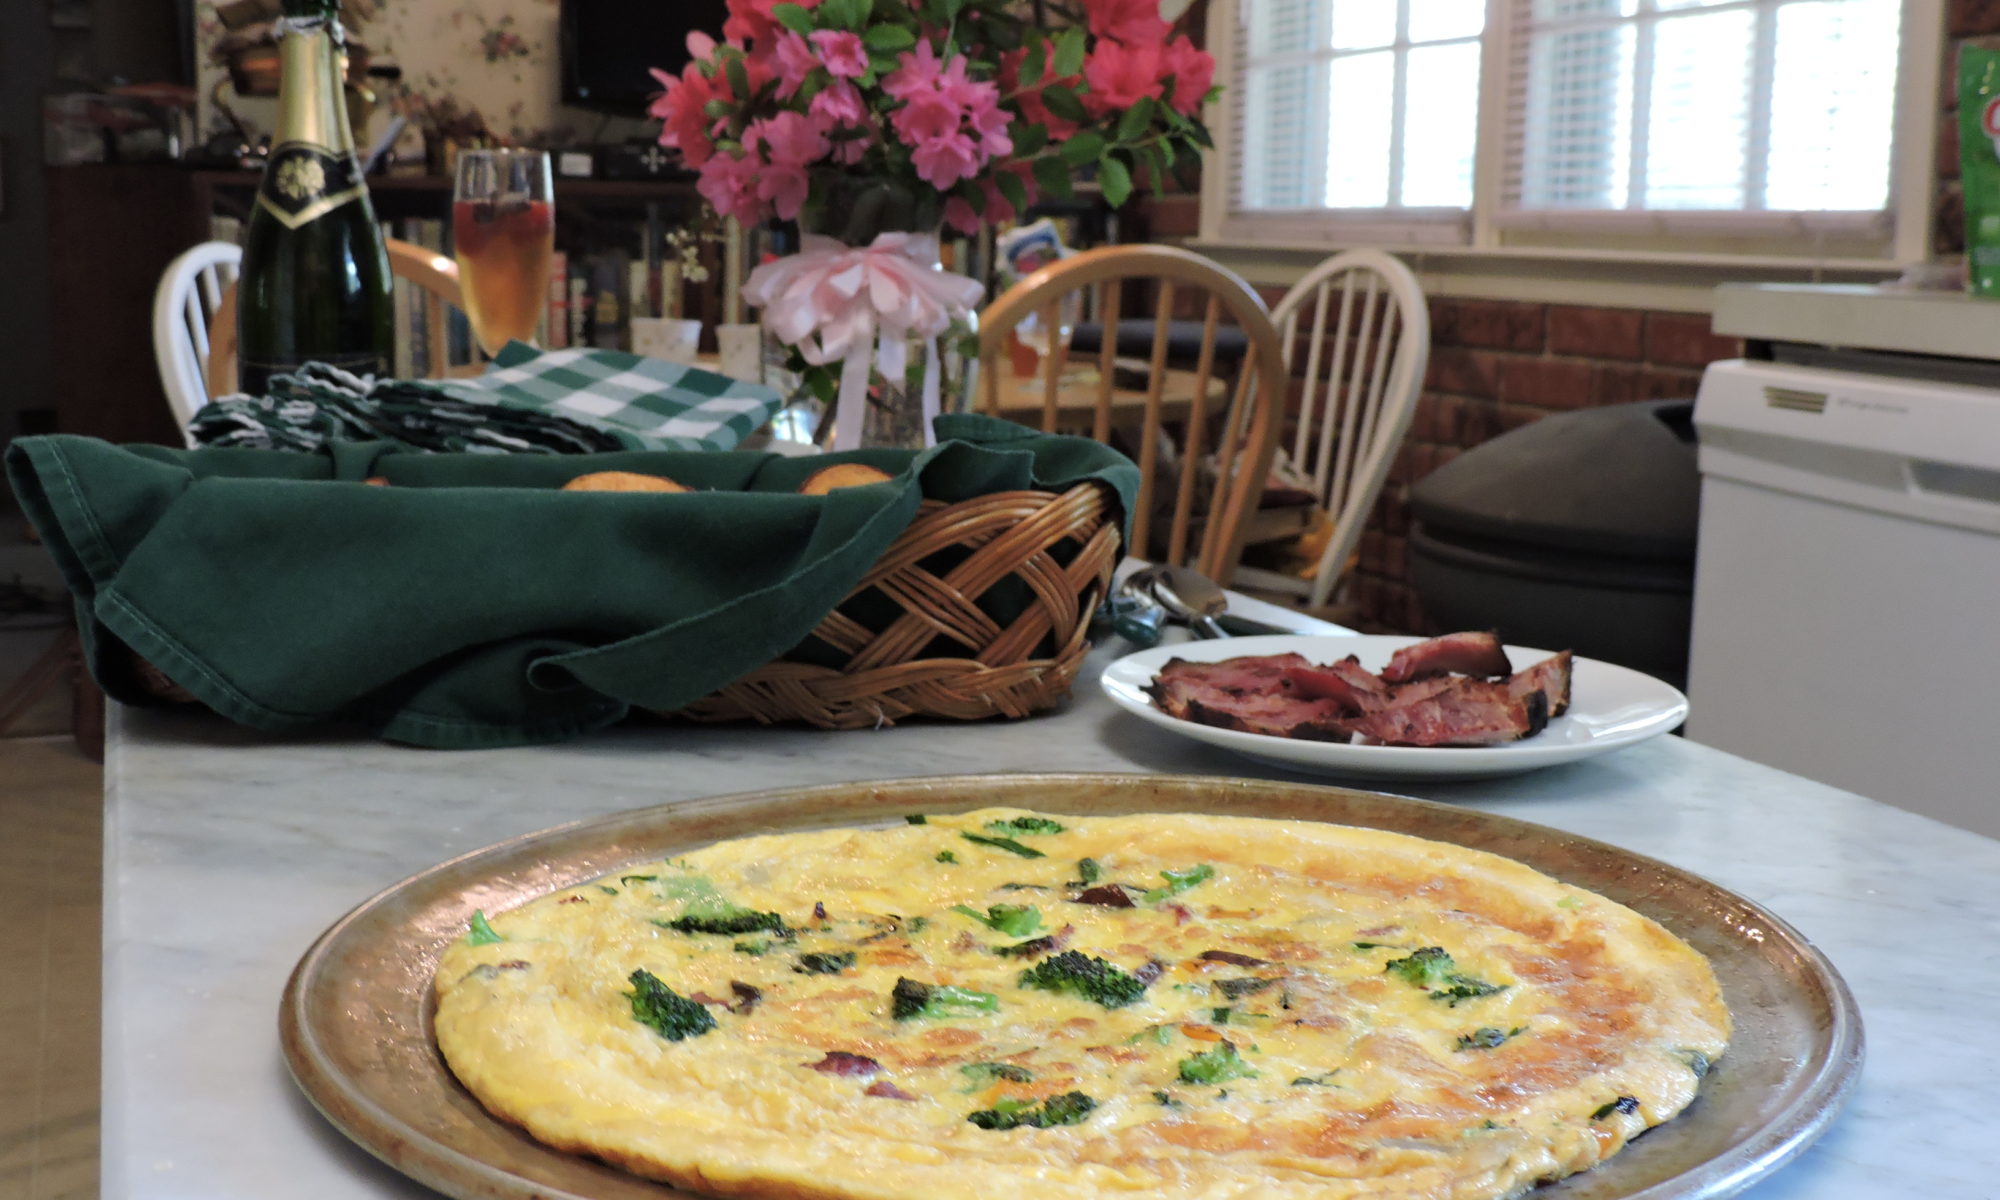
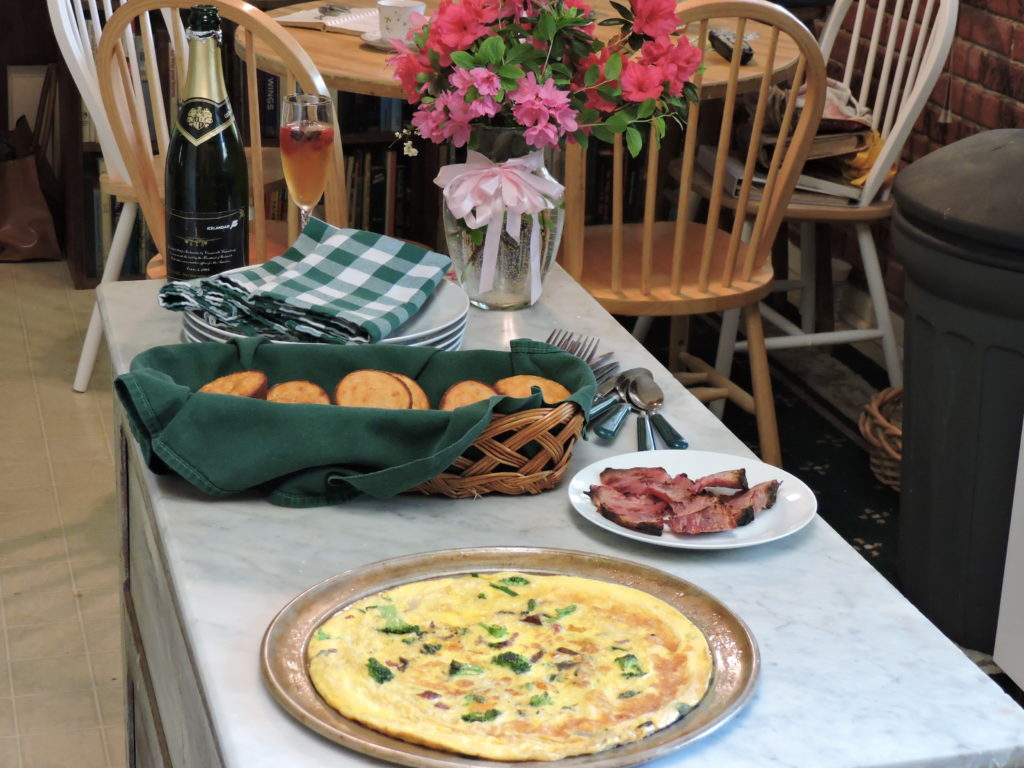
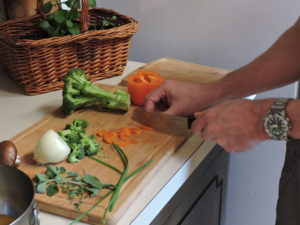
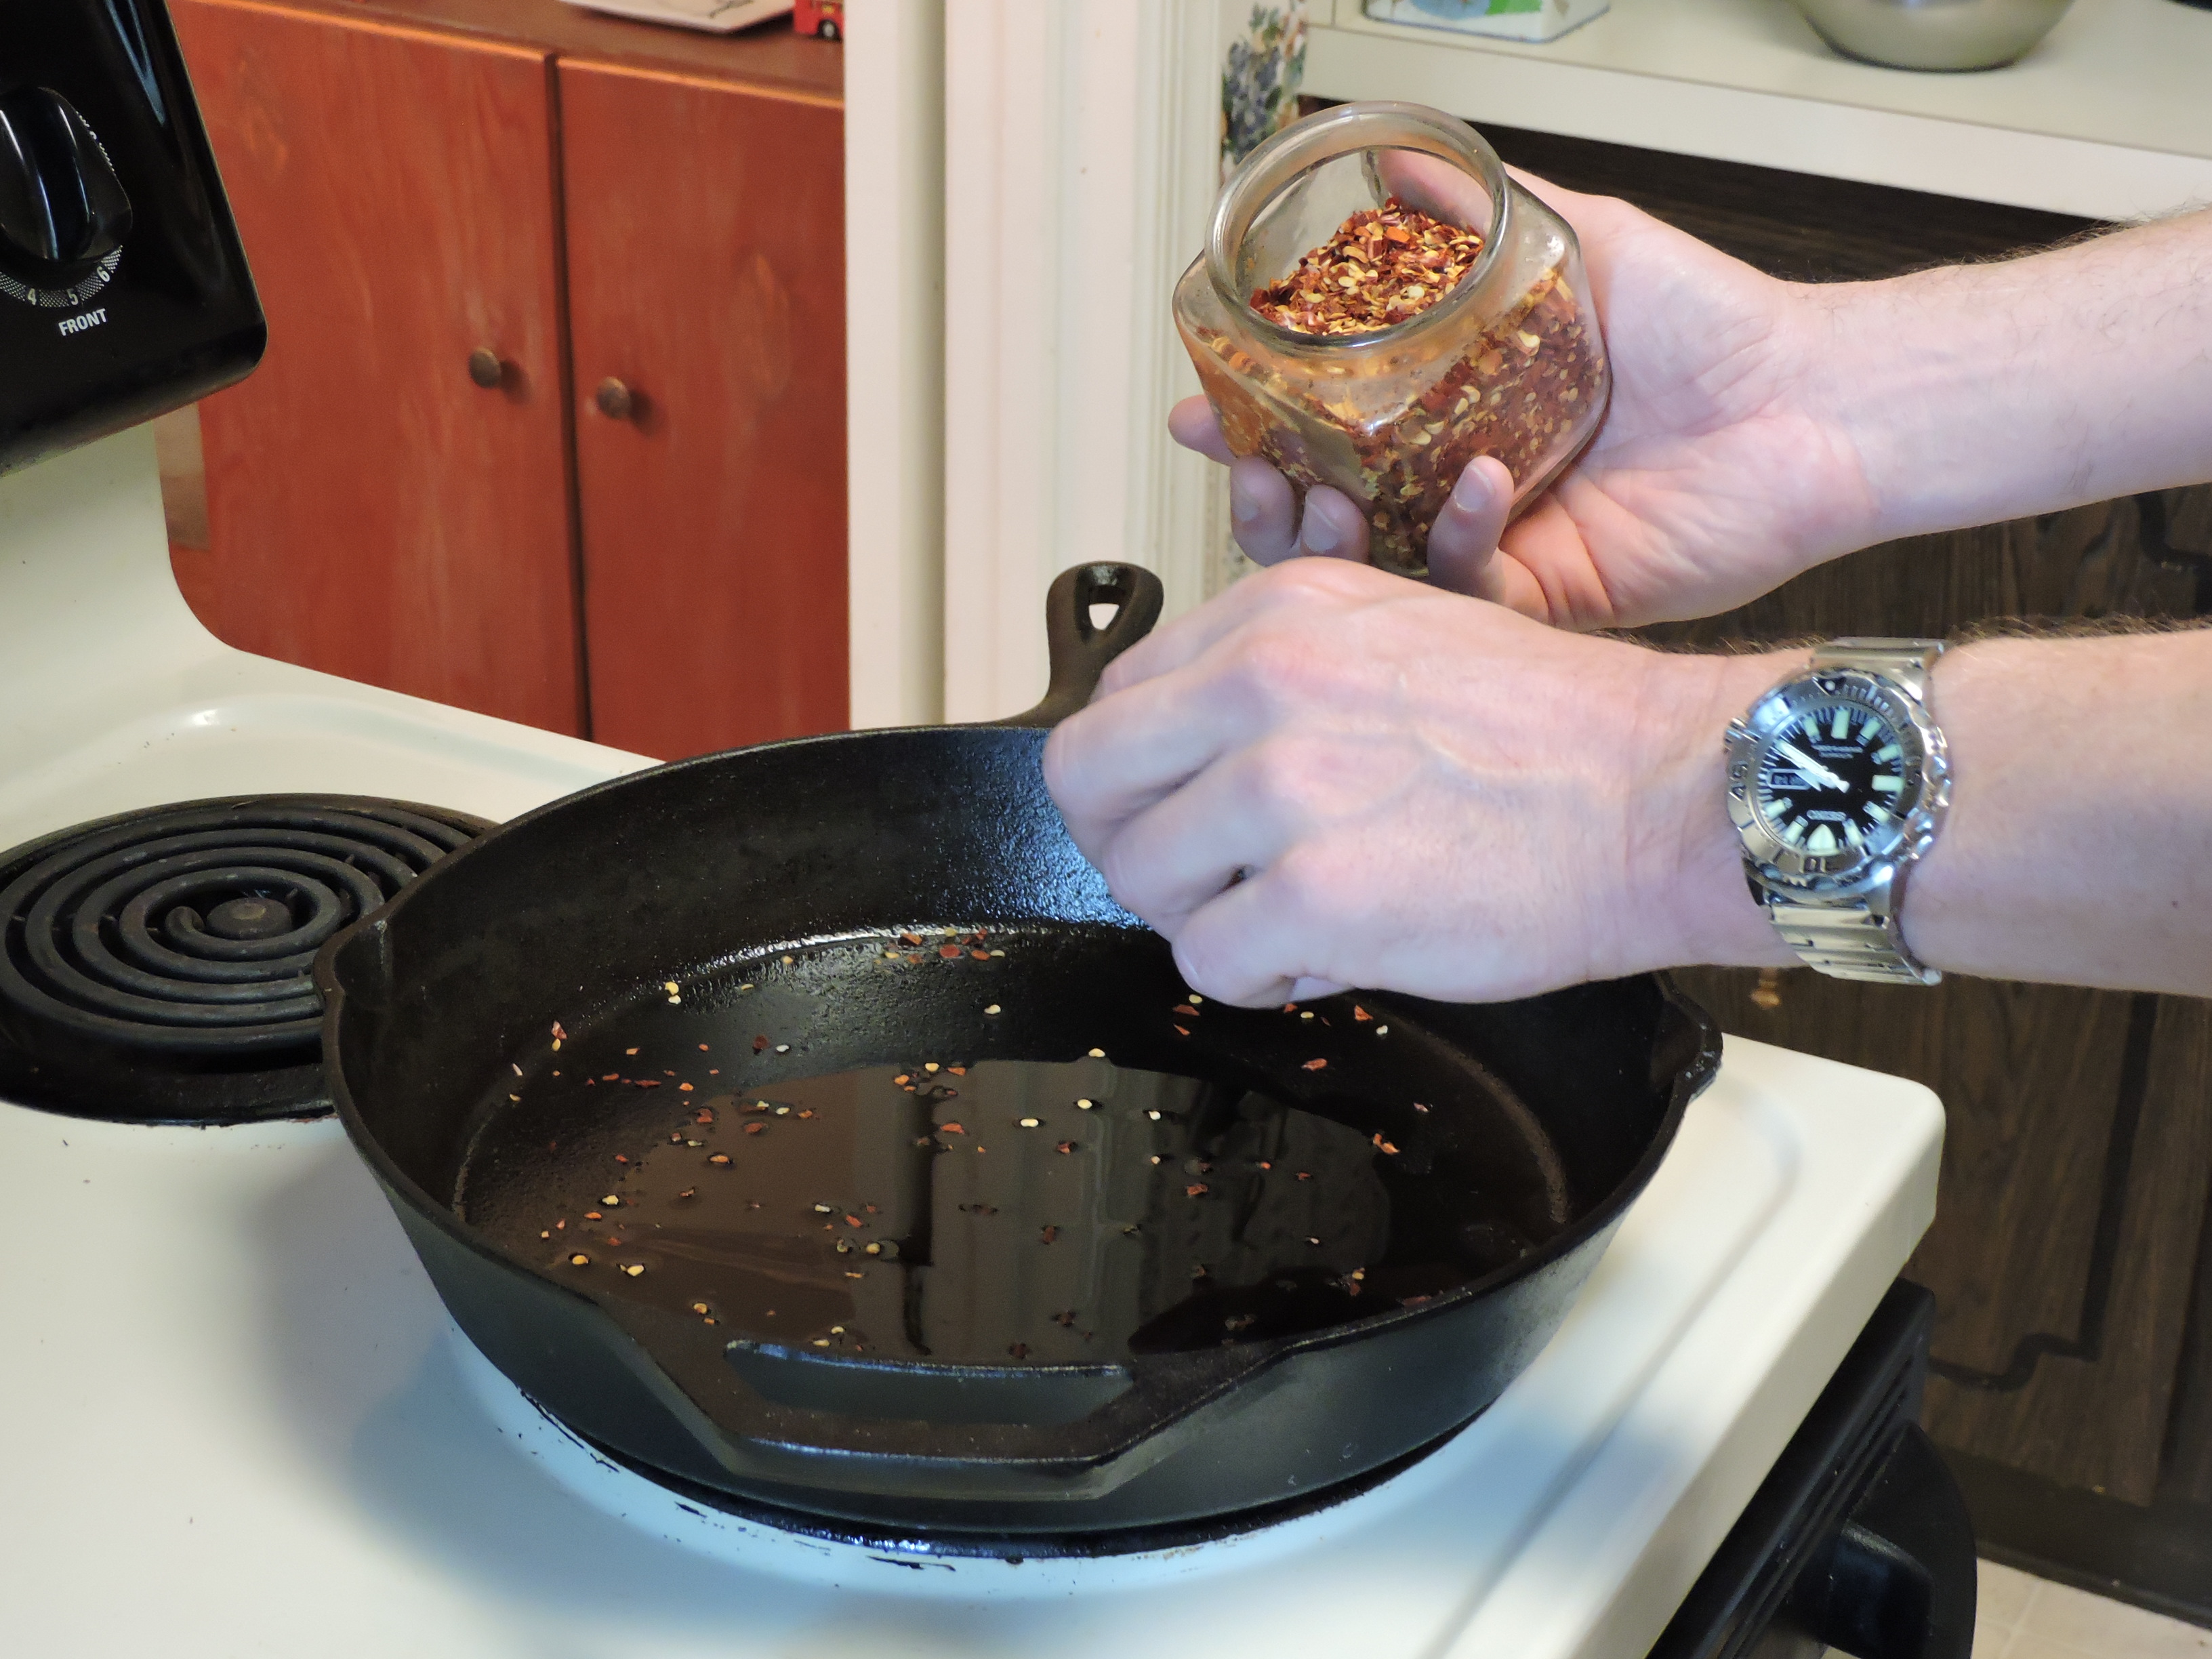
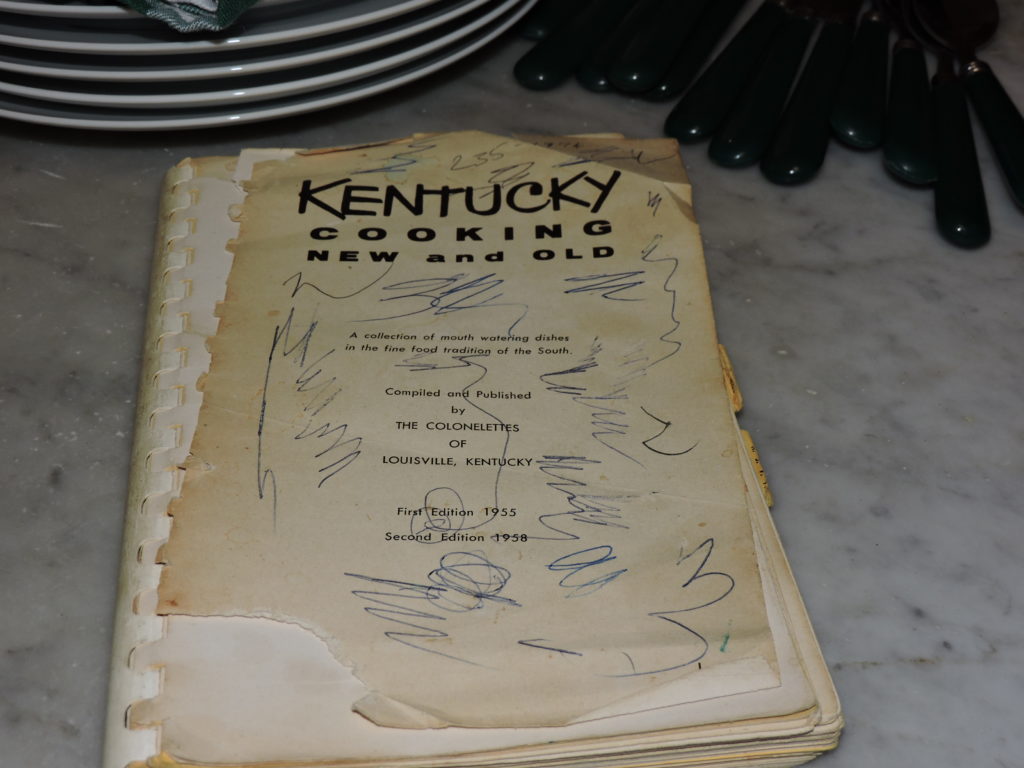
Thumbing through one day, I came across the menu for the Susemichels’ Derby Breakfast seen below.  I adopted the basic menu but generally  prepare mine as a brunch.  I love the idea of a simple but elegant Champagne Compote floating with strawberries.  But I  change out the scrambled eggs for an omelette and sometimes substitute corn or oatmeal muffins for the biscuits.  I invited my son Eric Tegler- a deft hand with omelettes or fish – to come cook with me.

Eric most often  makes one large omelette for company instead of individual ones.  He like to use a large cast iron skillet and his preparation methods are unconventional. But the results are sensational.    Here’s his recipe.

Eric’s Omelettes

  • Eggs – 6 to 8 depending on size of eggs and how many guests you’re serving
  • Milk, 3 Tablespoons
  • Extra virgin olive oil – 1 Tablespoon to season skillet
  • 1 large pat of buter
  • Red pepper flakes
  • Chopped onion
  • Chopped bell pepper (green, red, orange or yellow)
  • Mushrooms
  • Other raw veggies (chopped)  to your taste
  • Fresh herbs to your taste – Sage, chives, basil or oregano are good choices
  • Ham, bacon or sausage – Either on the side or cut into small pieces to whip into the omelette
  • Red pepper flakes to season the pan

You’ll need a skillet or non-stick pan, a cutting board, a bowl for the eggs, and a whisk.

Begin by dicing the onion, pepper and raw vegetables in preparation.

Crack the eggs into a large bowl, 


Six to eight eggs should do it. 


Add 3 Tablespoons of milk and whisk ingredients together.

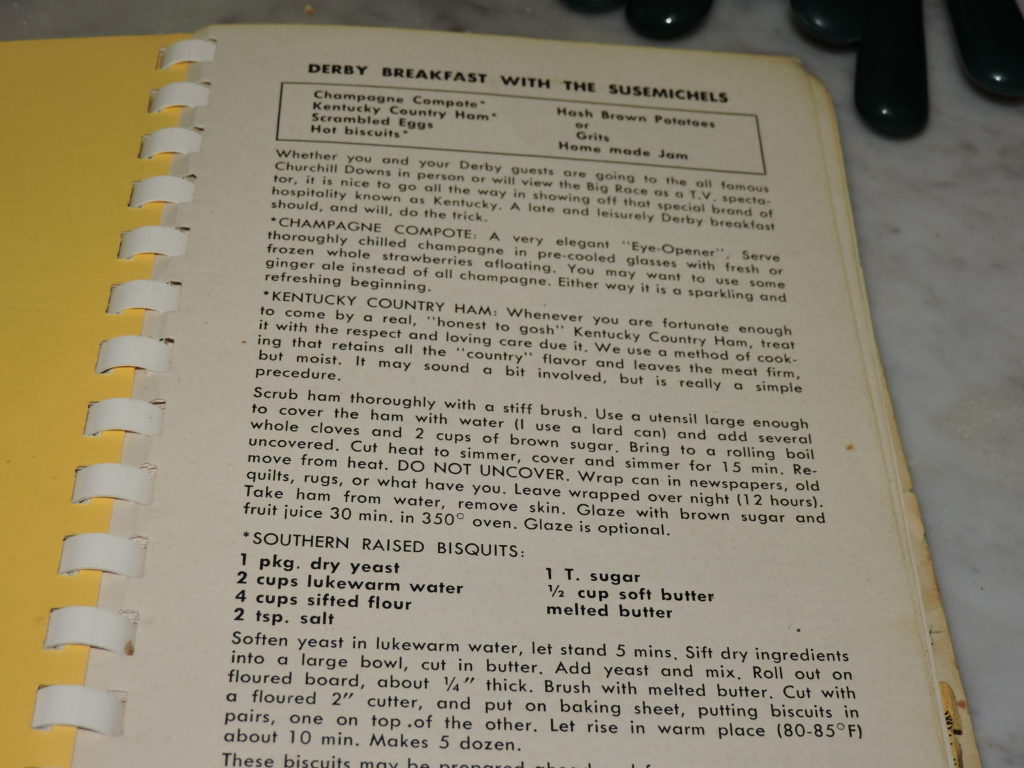
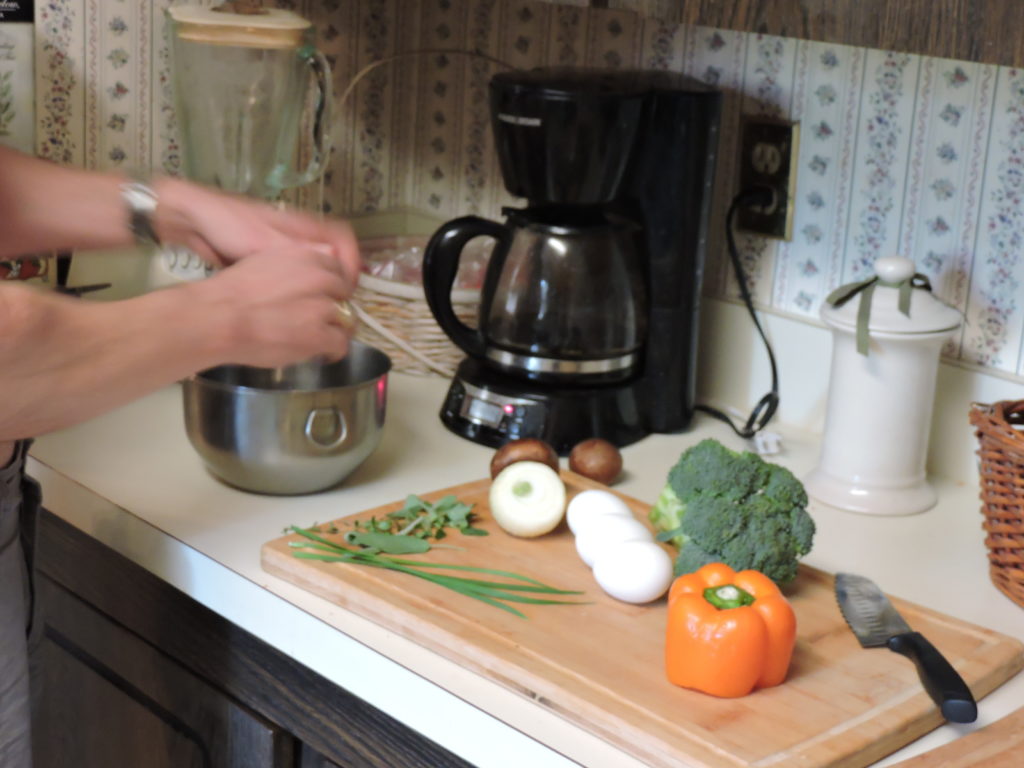
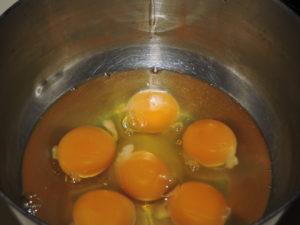
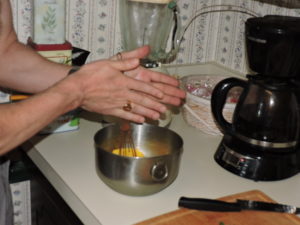
Eric’s whisking technique is unconventional to say the least.  He  rotates the whisk handle between his palms “at speed”.  He compares the action to using a vintage hand-drill.


When finished, the mixture should be light an frothy.

Next, prepare the skillet by adding olive oil and gently tipping the pan to cover the entire surface before adding and melting the butter.  Lightly sprinkle red pepper flakes across the pan
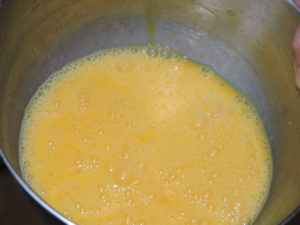
Add diced veggies all at once…  
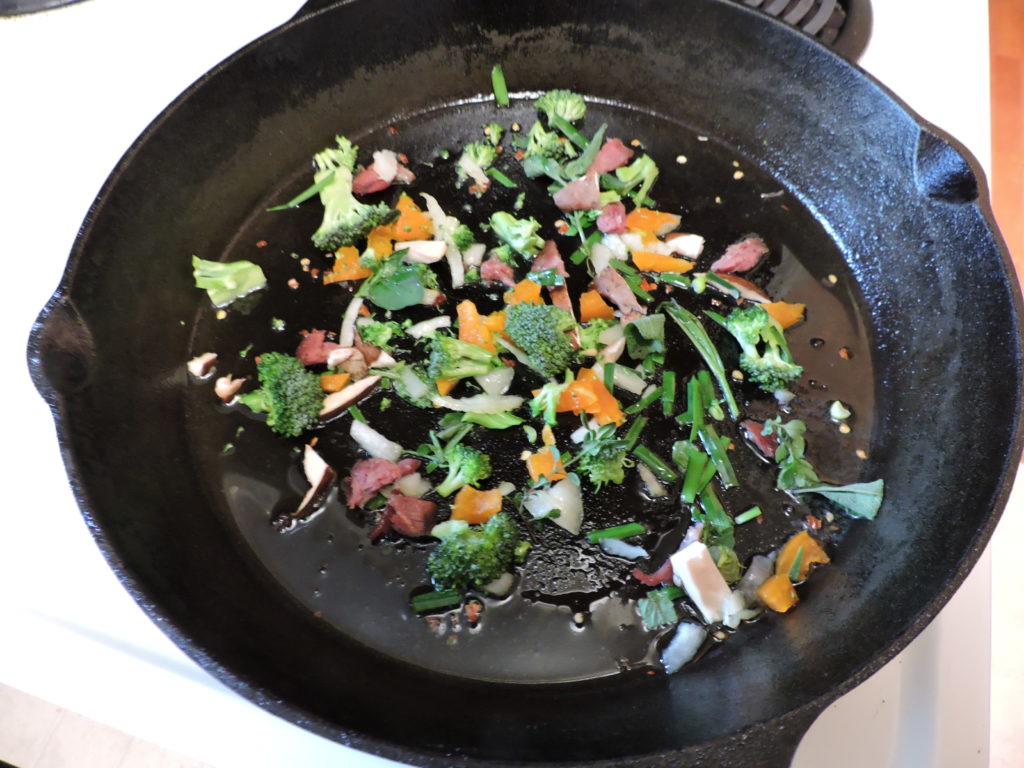
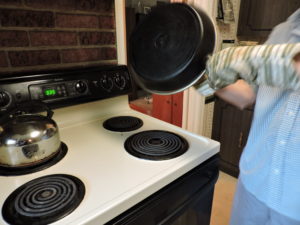
and saute gently before adding egg mixture.

Ta da!

A pizza pan becomes a lid for the skillet and has other uses as you’re about to see.

The burner should be set at a moderate temperature – a 6 or 7 – as the eggs cook.  When the egg mixture sets, Eric moves it off the burner to cool and then shakes the pan to loosen it. 

He then inverts the pan –  first flipping  the omelette upside down onto the pizza pan before deftly  sliding it back into the skillet.


While it cooks two minutes more, assemble your easy to serve Derby brunch buffet.  Place the muffins baked earlier in a basket, open 
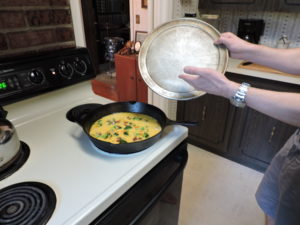
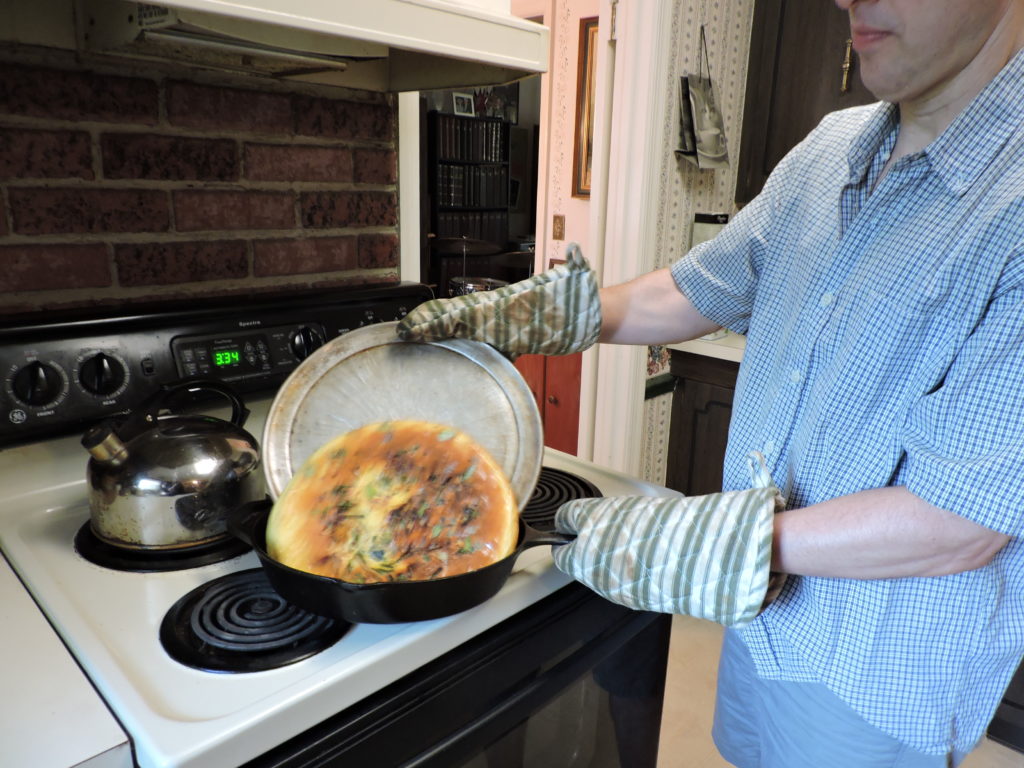
the (chilled) champagne and pour it over frozen strawberries and black raspberries. Check the omelette and, if done, slide it out onto the pizza pan which doubles  as a serving plate.  Then invite your guests to grab a plate, help themselves and find a seat at the table.


This simple Derby brunch is a great way to kick off Triple Crown season. Champagne cocktails with strawberries and black raspberries for a toast or two, corn muffins, ham and helpings of omelette await.  And afterwards…coffee on the screened porch.

It’s a delicious hearty brunch.  A great foundation for eventing or for watching Triple Crown races on TV.   My grandather, father or uncles would be set for the evening.